
Step 1
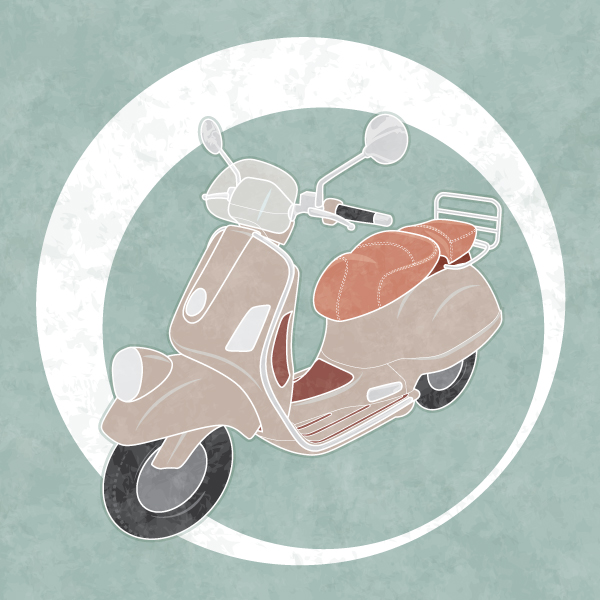
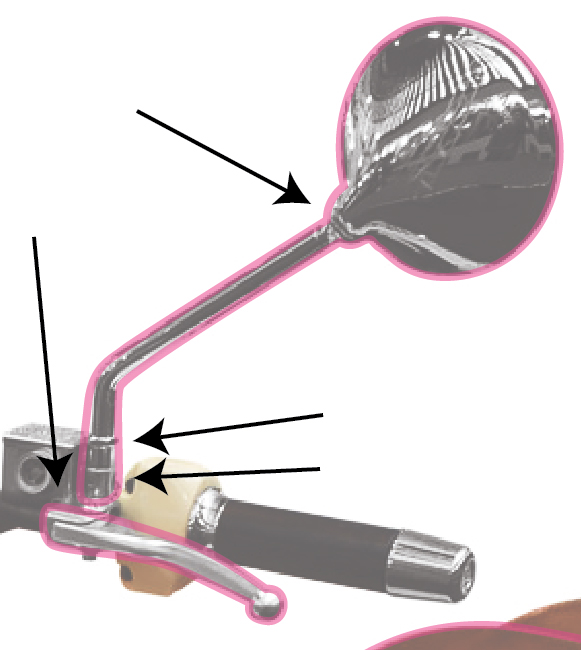
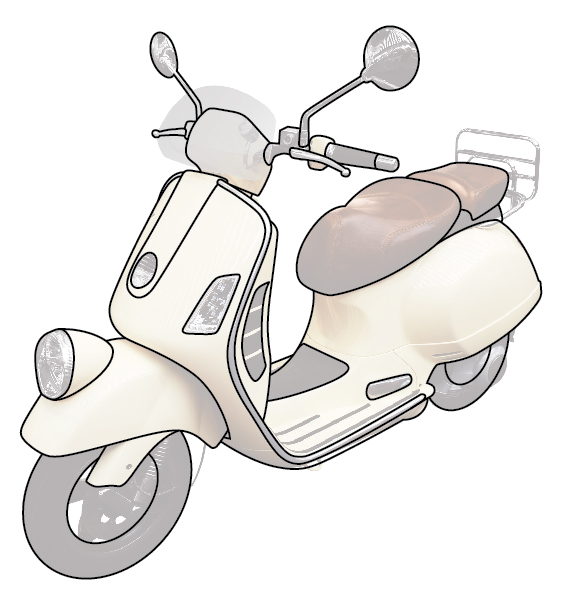
I’ll be using a stock image as a reference in this tutorial. In this tutorial, we’ll take it from a standard pixel based image to a well worn and stylish vintage graphic. Let’s get started with creating this retro vector.I’m going to start the line art by drawing complete shapes that don’t require additional lines from elsewhere to complete their form. All the line work, unless otherwise stated will be a 2pt Stroke Weight.
As long as when you look at the object on the entire illustration, you could name it, or have a good idea of its purpose, then you’ve simplified it well. You can tell by these shapes that one if a wing mirror and one is a break. You don’t need to see the ribs in the metal work, nor the hinge in the break.
Step 2
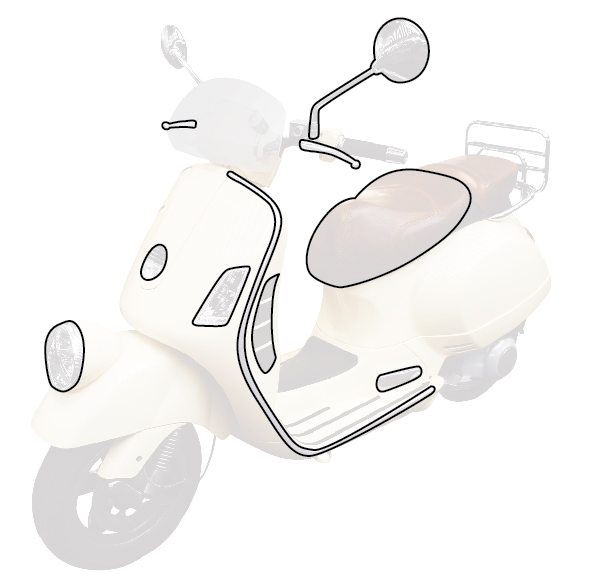
Now to draw the rest of the connecting lines. Ensure you have Smart Guides enabled (Command + U) and then draw in the rest of the elements – apart from the wheels, windscreen and chrome bars at the back.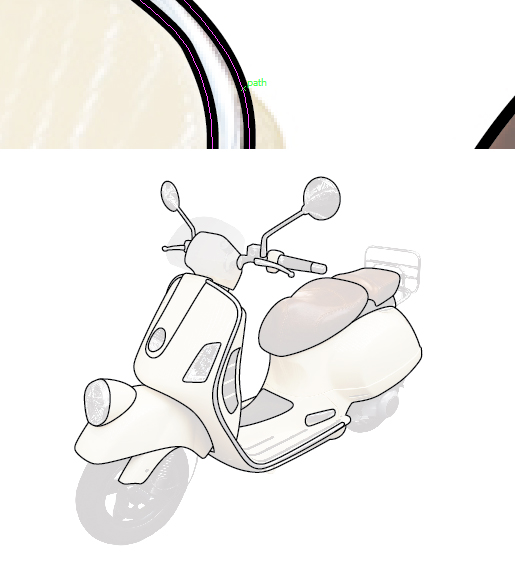
Step 3
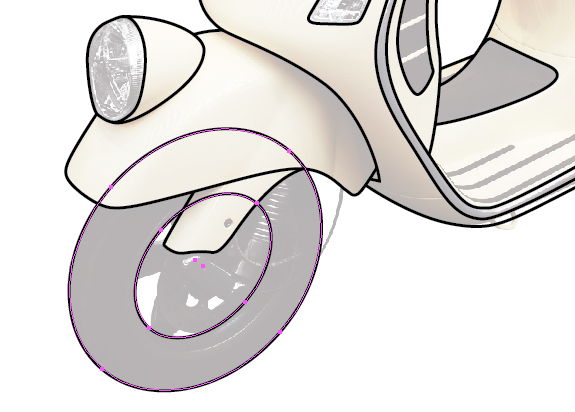
For the wheels, I’m going to be using the Ellipse Tool (L) and then the Free Transform Tool (E) to rotate and modify the circle for the tire.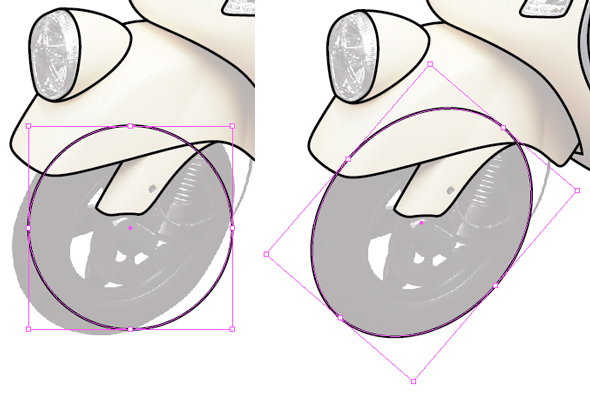
Step 4
While a circle for the wheel is selected, use the Pen Tool (P) to add points where the lines intersect with the rest of the body using Smart Guides (Command + U) for help.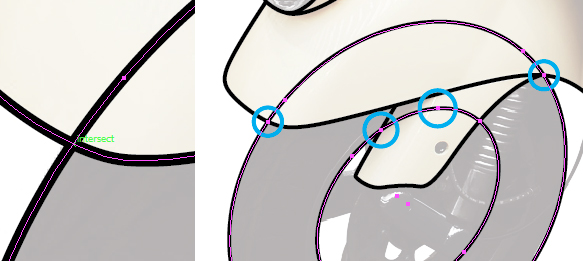
Step 5
With the Direct Selection Tool (A), select the lines between your newly added points and delete them. You’re aiming to delete the lines that are overlapping onto the scooter’s body work.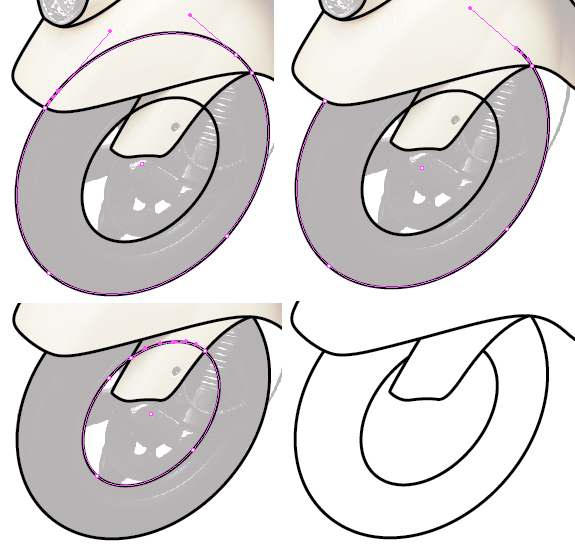
Step 6
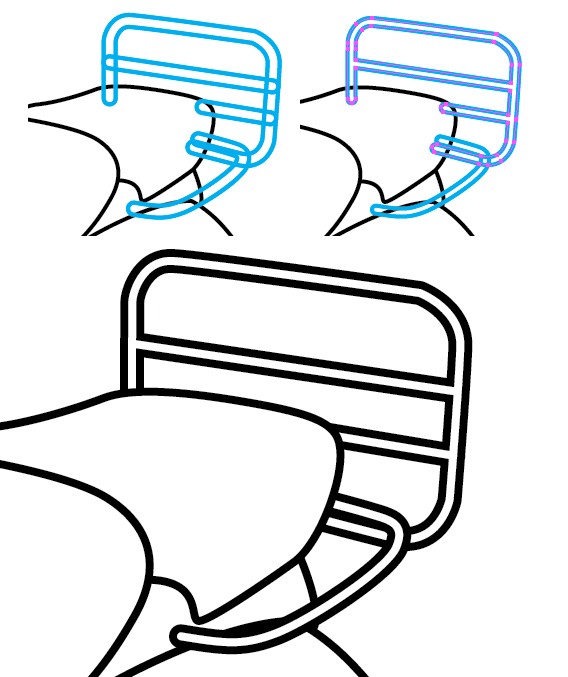
For the chrome bars at the back, I’ve drawn them with a 4pt Stroke Weight set of lines and then used Object > Expand to turn the strokes into filled shapes.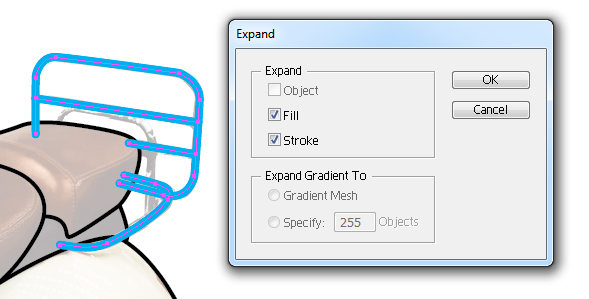
Step 7
Select All of your line work (Command + A) and then use the Live Paint Bucket (K) to fill in the areas. I’ve created a vintage style palette with the idea of an enamel coated metal body and worn leather seat. After filling each shape, I selected the Live Paint group and changed the stroke color to white.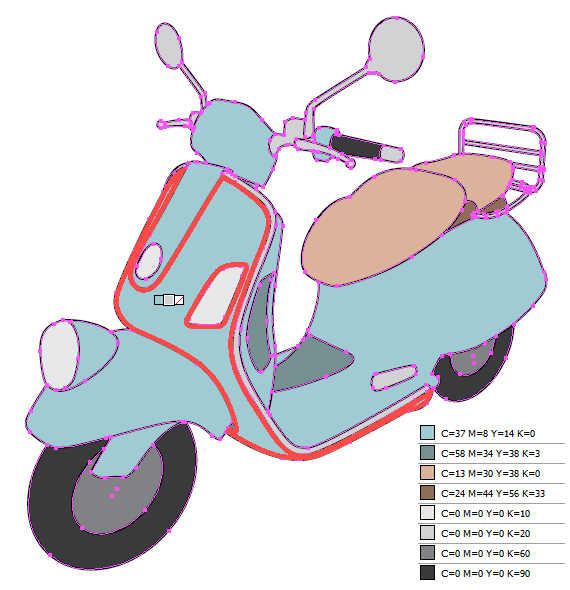
Step 8
To give the scooter more definition, I’m going to add some 0.5pt Stroke Weight lines around the body and seat. Again, use Smart Guides (Command + U) to help you intersect the lines.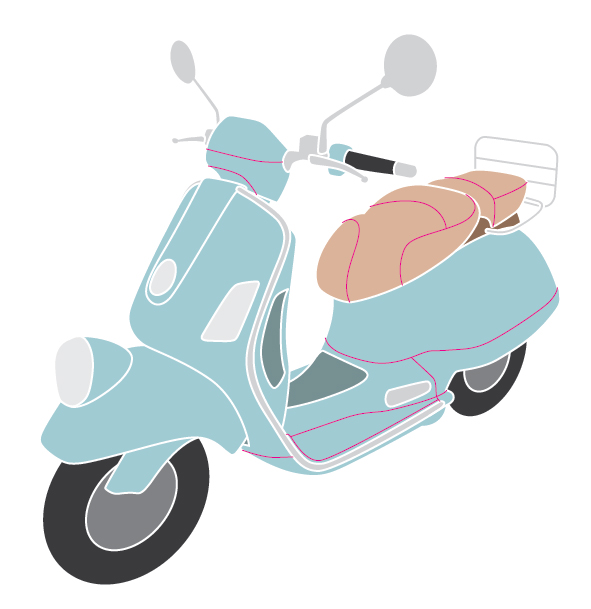
Step 9
For the lines on the seat, I’m going to create a stitch effect. In the Appearance panel, click on the Add New Effect button and go to Path > Offset Path and offset by 1pt. This will create a double line effect with 1pt in between. Then in the Stroke panel, I’m going to enable dashes and enter the value 2pt.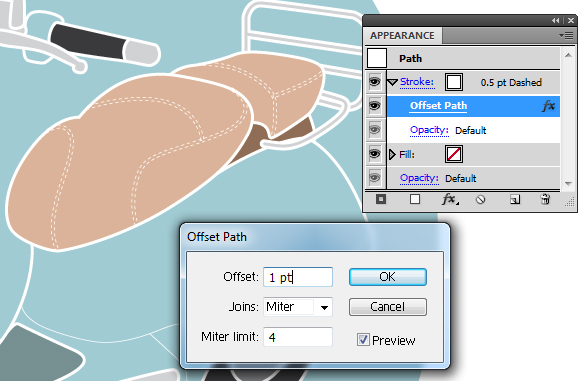
Step 10
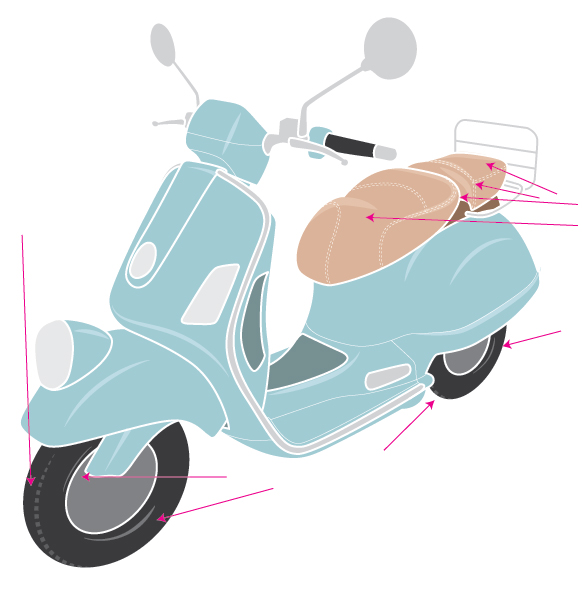
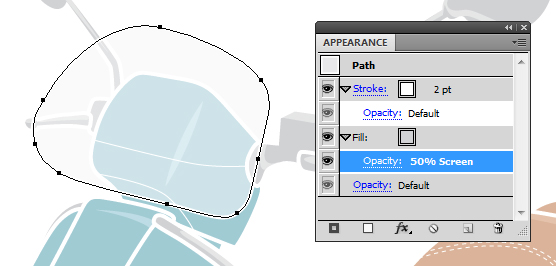
I’m going to draw some additional lines on the body work to create shines in the enamel. It will have the same stroke color, but with Blending Mode Screen, and Opacity 50%. Depending on the placement of the line, will determine its Stroke Weight (up to 4pt) and its Profile. For instance, on the wheel arch as it’s a large area, it’s a 4pt stroke. As the line isn’t intersecting with another, it’s using a tapered profile at both ends (Width Profile 1).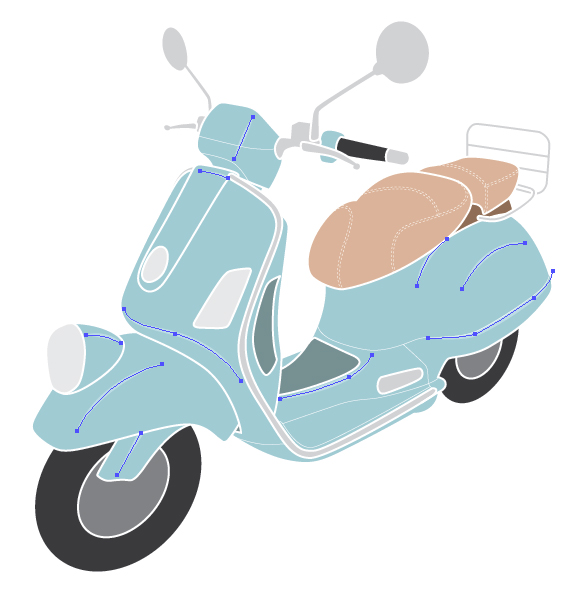
Step 11
The shine on the chrome is a bit more complex and for this I’m going to use the Pen Tool (P) to create some less uniform shapes. These shines will have a light gray fill (C=0, M=0, Y=0, K=20) and will be set to Blending Mode Screen with Opacity 55%.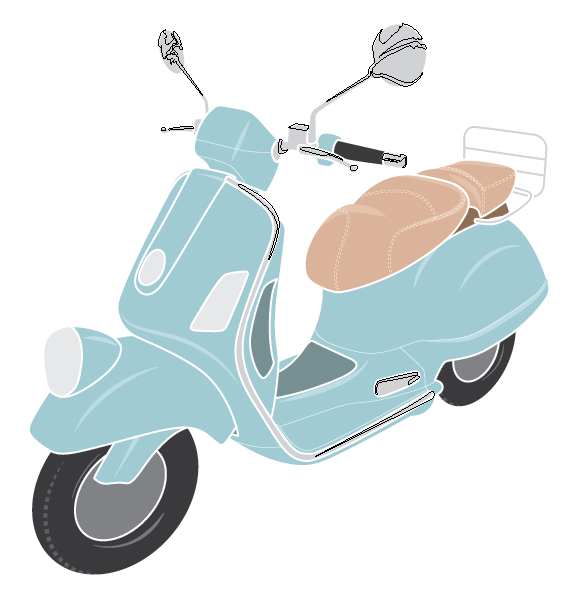
Step 12
I skipped over two elements of the illustration. The first are the foot grips. These have a 1pt Stroke Weight (instead of 2pt). I need to include these small elements as they help give the foot area (told you I know nothing about scooters!) shape. If I was to use a 2pt Stroke Weight, the area may look a bit too cluttered.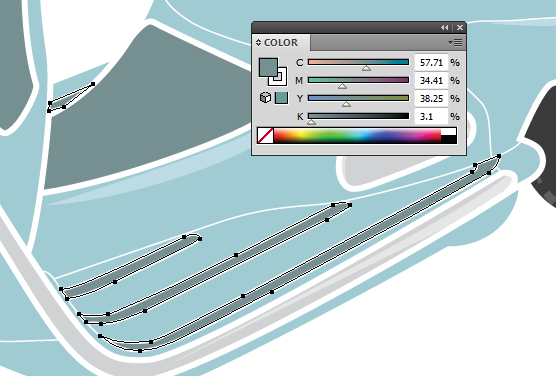
Step 13
Now to add a quick background to the illustration using the Ellipse Tool (L) to create a circle with a blue fill and a 100pt teal stroke. To give it a sixties feel, I’m going to give it an uneven stroke by applying a Profile… specifically Width Profile 6.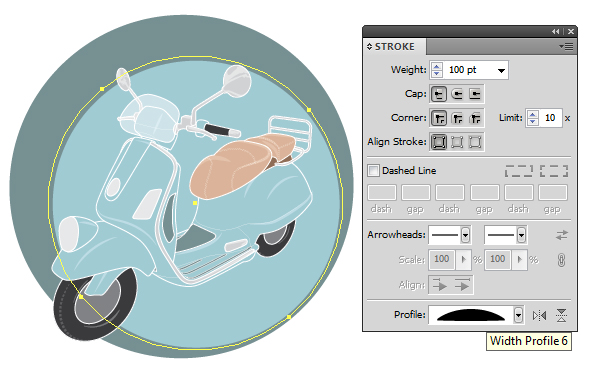
Step 14
I decided to add a blue Rectangle (M) behind the circle and then change the stroke color for the circle to white to match the line art of the scooter. However, in changing this around, I decided to alter the overall colors of the illustration. I did this by adding a further Rectangle (M) over all the elements of the scooter with a peach fill (C=0, M=50, Y=47, K=0) and set it to Blending Mode Color Burn with Opacity 100%.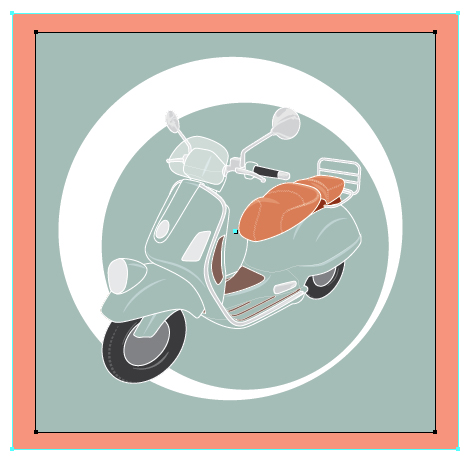
Step 15
To add a simple, quick texture over the top, I’m going to use the Paintbrush Tool (B) to draw strokes across the canvas with a white 20pt Stroke Weight and set to Opacity 5%. The brush I’m using is called “Chalk – Scribble” and can be found via the drill down menu in the Brush panel and going to Open Brush Library > Artistic > Artistic_ChalkCharcoalPencil.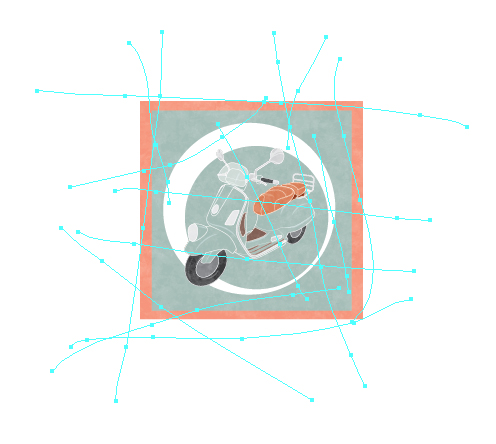
Step 16
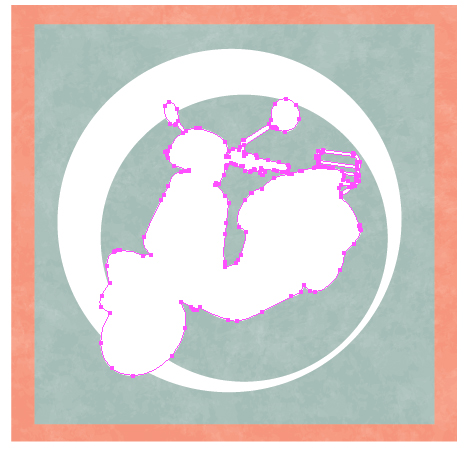
Looking over the illustration, I can’t help feel the scooter is lost in the background – so I want to play with the colors of the scooter. I’m going to do this quickly by duplicating all the shapes and lines for the scooter and Object > Expanding them to shapes.
Step 17
I’ve given this shape a dark brown fill (C=55, M=60, Y=65, K=40) and changed the Blending Mode to Saturation. To make the scooter stand out further, I’ve added a 3pt outside aligned stroke with the blue shade, set to Blending Mode Multiply and Opacity 50%.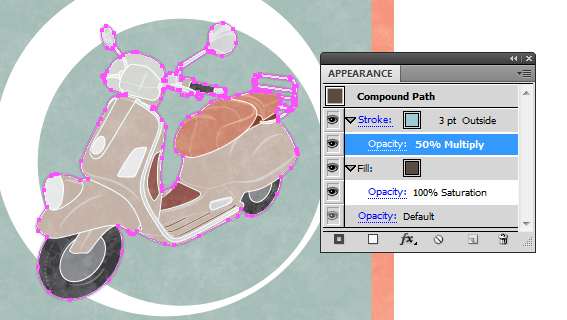
Step 18
To help it stand out further, I’ve added some “Chalk – Scribble” lines underneath the scooter with a blue stroke and 20pt Stroke Weight, set to Blending Mode Multiply, and Opacity 10%. This will add additional texture to the background and not on top of the scooter itself. It will also add a darker texture to the white circle.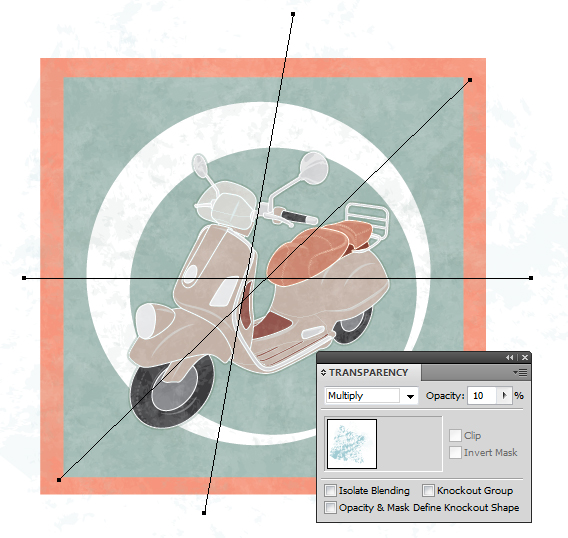
Step 19
Finally, using the Artboard Tool (Shift + O), I’ve ensured the artboard is an even square by first centering the artboard and then altering the Width and Height values.
Conclusion
I hope you’ve enjoyed today’s tutorial on creating a retro vector graphic illustration. You take this workflow and tips and apply it creating quick line art based illustrations with a vector vintage twist.
Tidak ada komentar:
Posting Komentar