

- Program: Adobe InDesign CS4
- Difficulty: Intermediate
- Estimated Completion Time: 3 hours
Final Product What You'll Be Creating
InDesign allows you to collect all documents in a Book. Using Book,
you can easily synchronize styles in every document and maintain a
consistent layout throughout your project. In this tutorial, we will
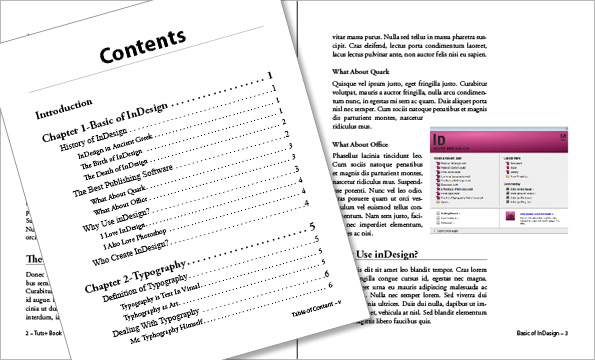
create a book made from 3 chapters, complete with Table of Content,
Introduction, and a Cover. You will learn the concepts of InDesign, from
applying styles, adding page numbers, warping text, using variables and
master pages. Let’s get started!


Step 1: Creating the First Document
Lets start by creating a new document (File > New). Use size Legal-Half, with 3 columns.Step 2
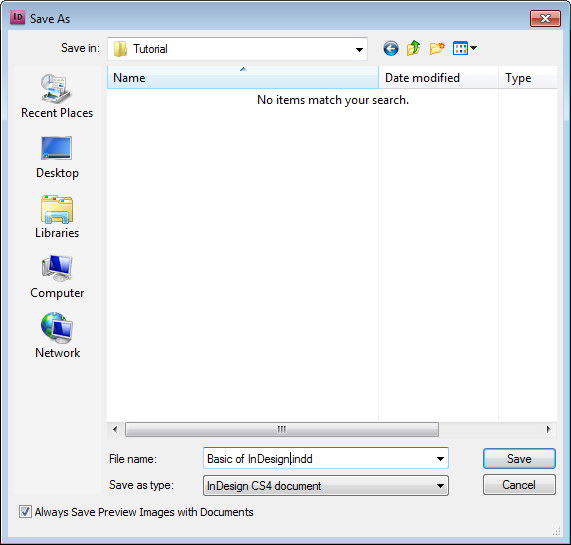
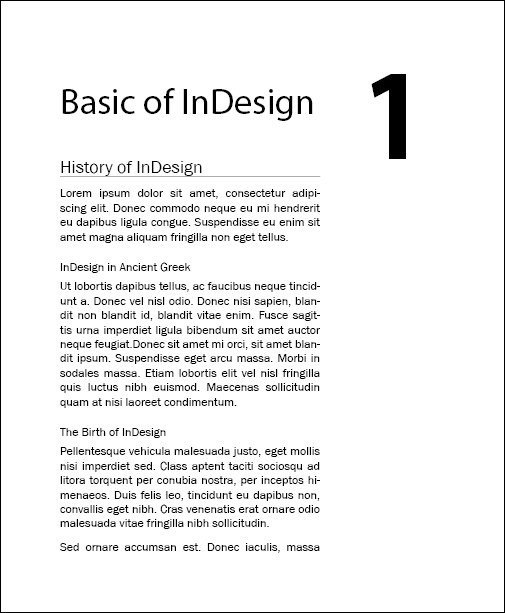
We will use this document as our first chapter. The file name should be the same as the chapter, in our case "Basic of InDesign".Step 3: Master Page
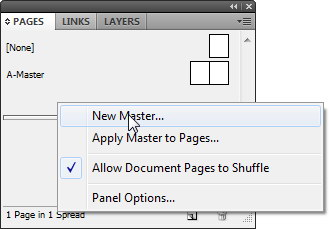
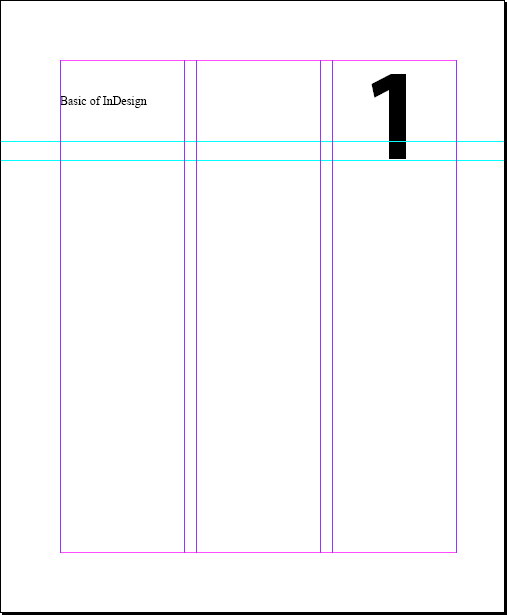
First, we need to define a master page. In the Pages Panel, right click and choose New Master. Name the new master page "B-First". We will use this master page for every first page of a chapter.Step 4
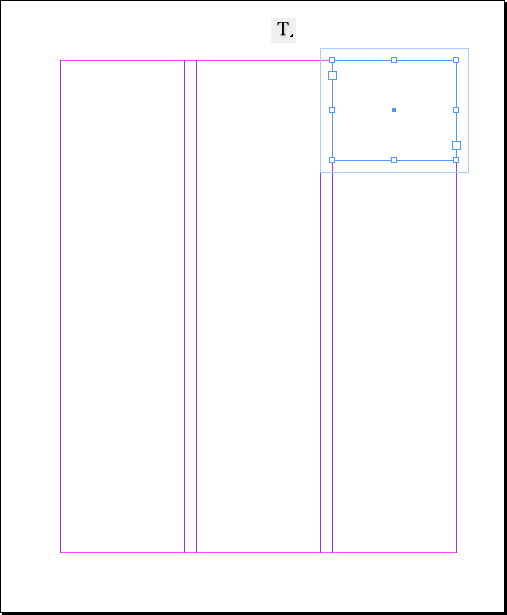
In the Pages Panels, double click the "B-First" thumbnail to edit it. Activate the type tool and drag to create a text frame.Step 5
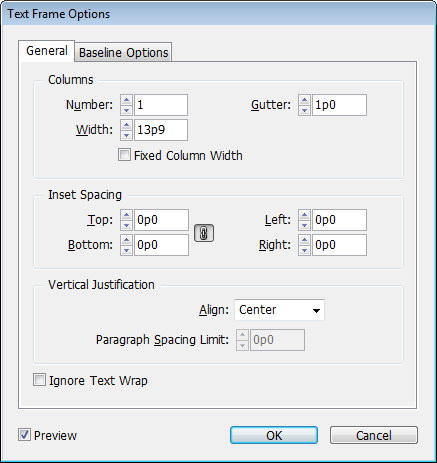
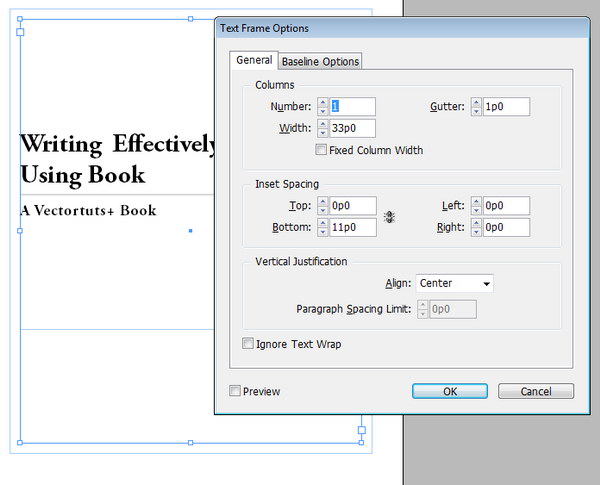
Right click on the text frame and choose Text Frame Options. Select Align: Center. This setting will center everything inside the text frame .Step 6
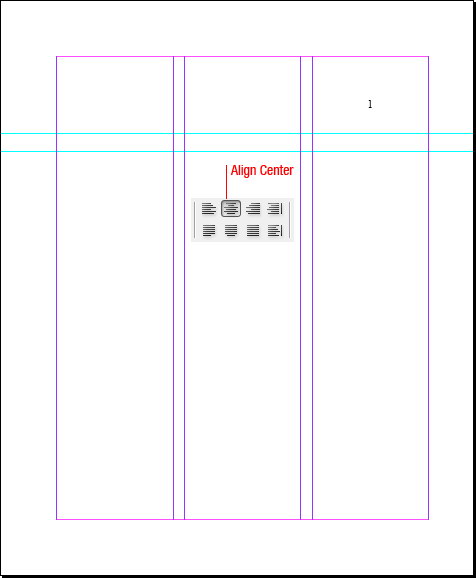
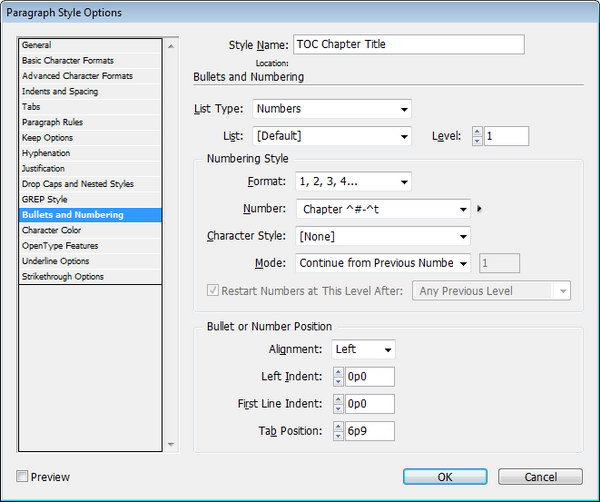
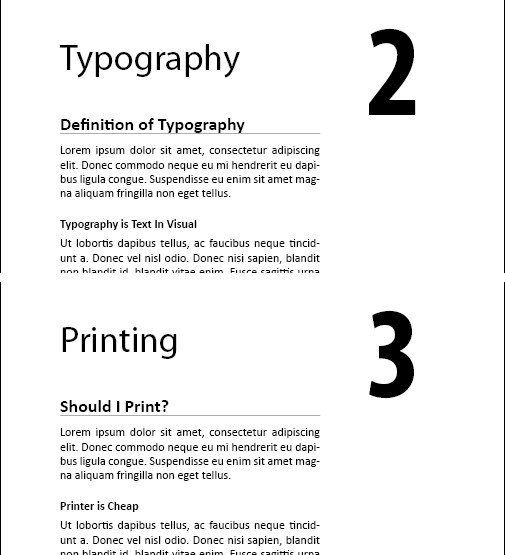
Double click the text frame to insert text. We wont use static text here, instead we will use a variable. Click Type > Text Variables > Insert Variable > Chapter Number. We will have 1 set, because this is the chapter number of the document. From the option bar select Align Center.Step 7: Using Character Styles
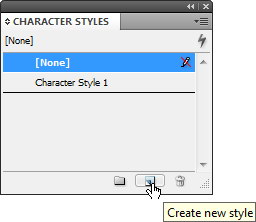
Let’s change the chapter number character using Character Styles. Open the Character Styles panel and click the Create New Style icon.Step 8
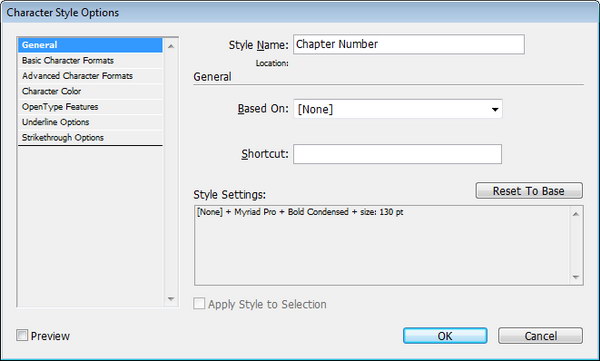
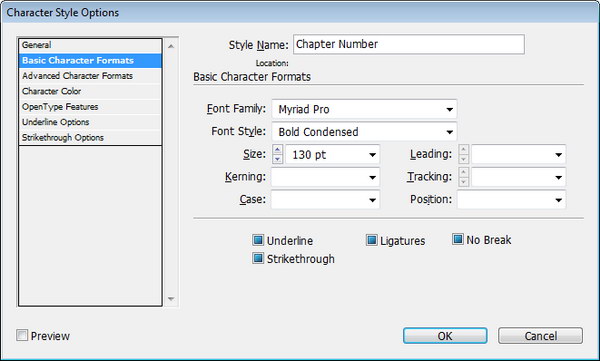
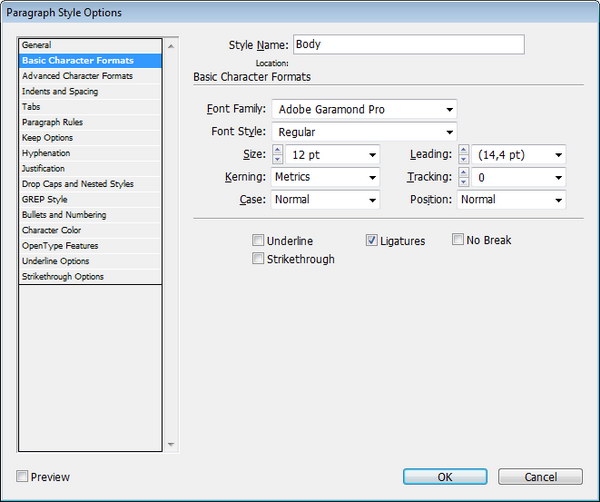
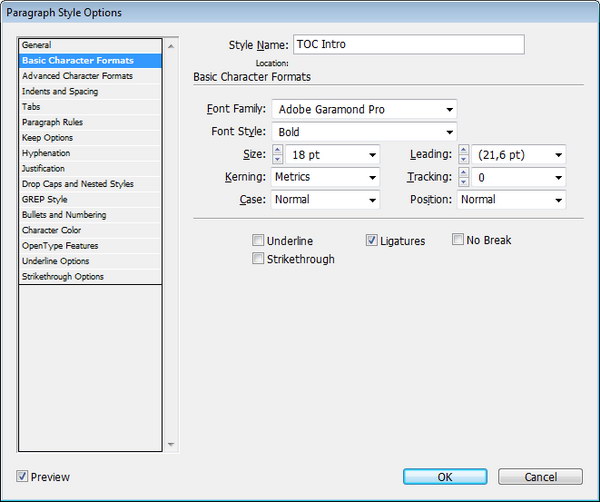
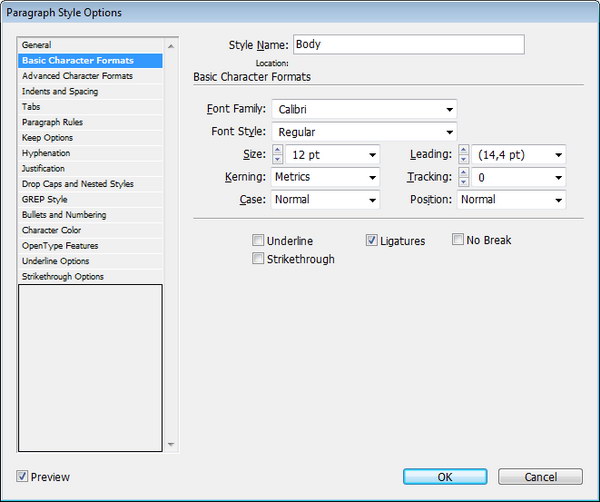
Double click New Character Style to edit it. Change the name to "Chapter Number" and change the font setting in Basic Character Formats, you can use the image blow as a guide.Step 9
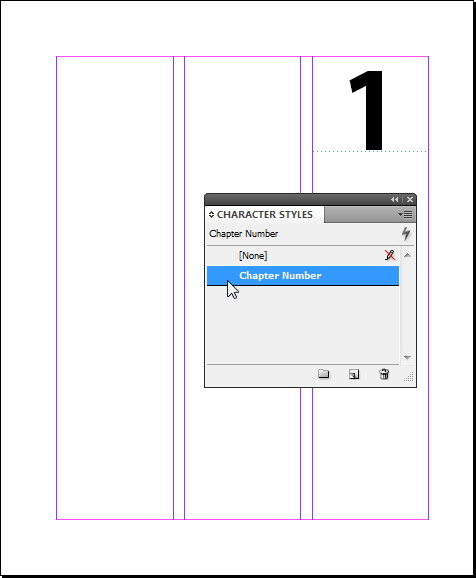
Select the chapter number and click Chapter Number style to apply the new style.Step 10
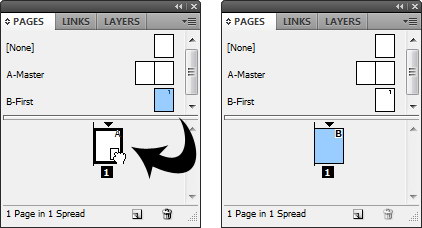
The "B-First" master page is now created. In the Pages Panel, double click Page 1 to return to a normal page. Currently page 1 is still using Master Page A, indicated by A in the top corner. Apply "B-Fist" to the first page by dragging it onto the first page’s thumbnail.Step 11
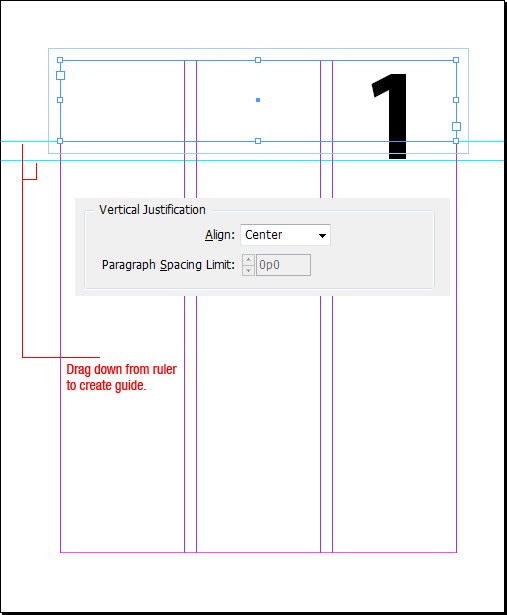
If you don’t see rulers around the page press Control + R to bring them up. Drag a horizontal guide out from the ruler. Use the guide to create a text frame on top of the page. Right click the text frame, choose text Frame Options, and set the Vertical Justification to Align to Center. We will use this text frame for the chapter title.Step 12
Again, we will not be using static text here. Remember that earlier, we named this document as Chapter Title. So, click Type > Text Variables > Insert Variable > File Name.Step 13: Create and Apply Paragraph Styles
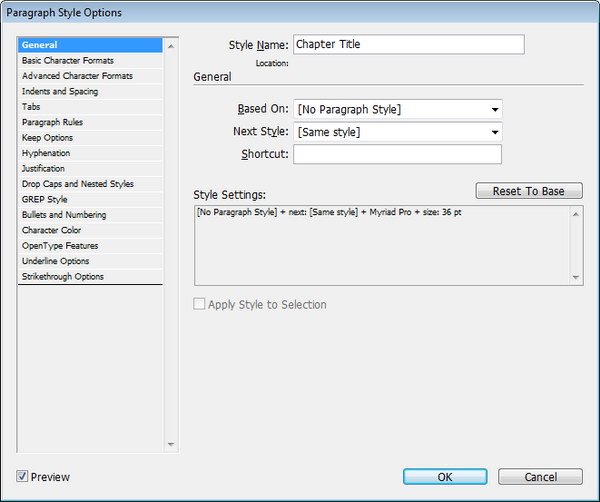
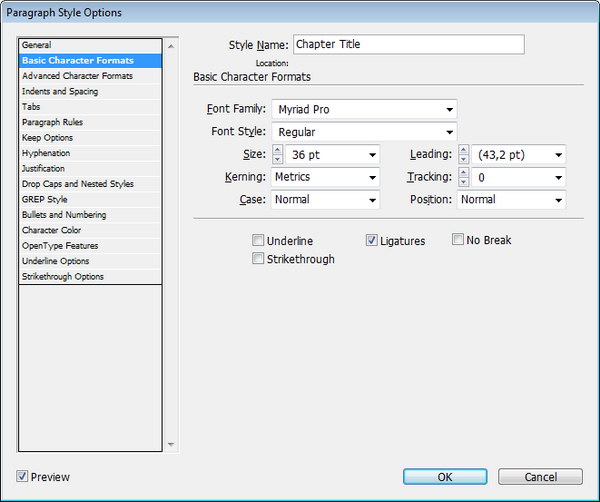
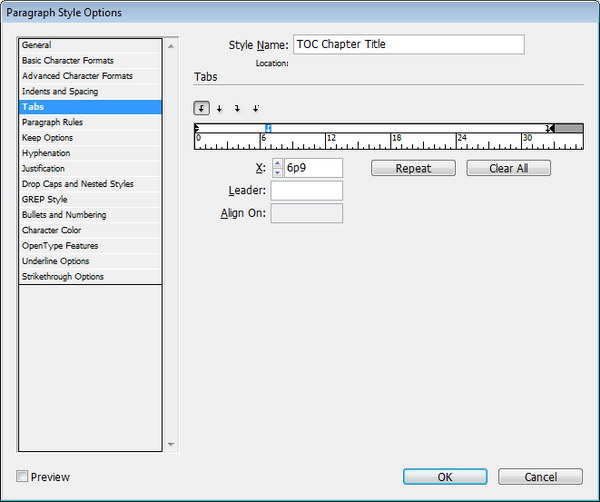
Currently, the chapter title has basic formatting. Let’s create a paragraph style for it. In the Paragraph Styles Panel, click the Create New Style icon. Double click to edit it. Name the style "Chapter Title". Use the settings shown below.Step 14
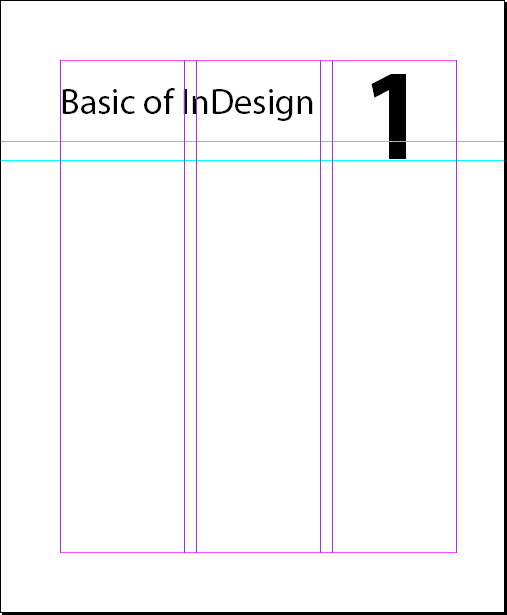
Apply the New Paragraph style and see it changes. If you don’t like it, you can always edit the style again.Step 15
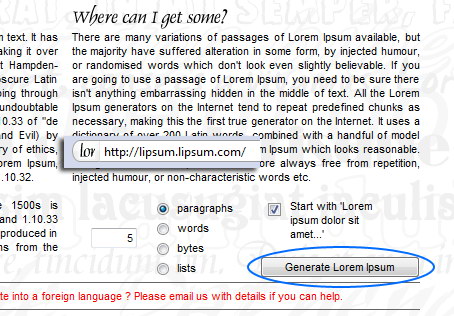
Let’s add some place holder text for the content. Go to lipsum.org and click on Generate Lorem Ipsum button. Select the lorem ipsum generated paragraph and press Ctrl + C to copy.Step 16: Working on Flowing Text
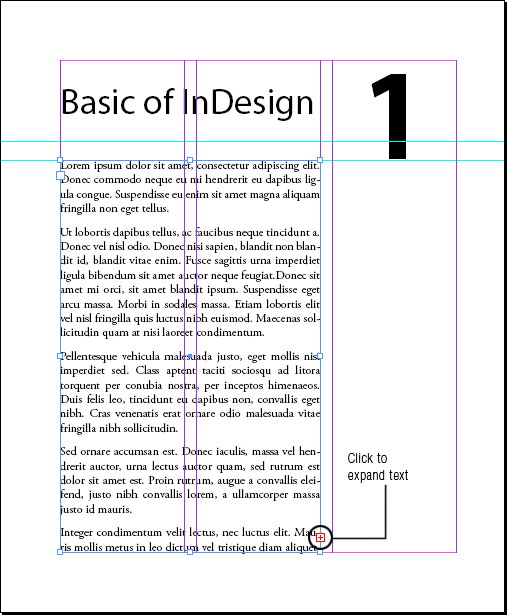
Create a text frame and paste in the lorem ipsum text. You may find a plus sign at the bottom of the Text Frame. This sign indicates that there’s some text hidden inside the text frame, don’t worry about this for now, we will be editing the text later.Step 17
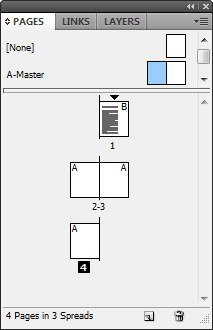
In the Pages Panel add a new a page by clicking the New Page icon. Apply "Master Page A" for the new page.Step 18
Create another text frame, the unseen text from the first frame will overflow into this frame. If it doesn’t click on the red plus sign with the text tool and then click into the new text frame.Step 19
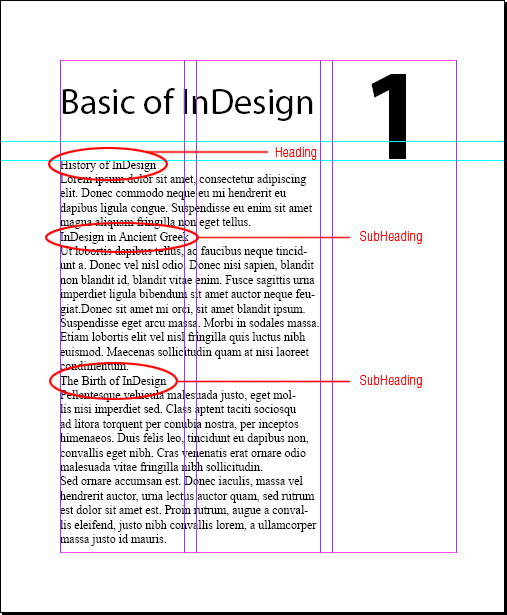
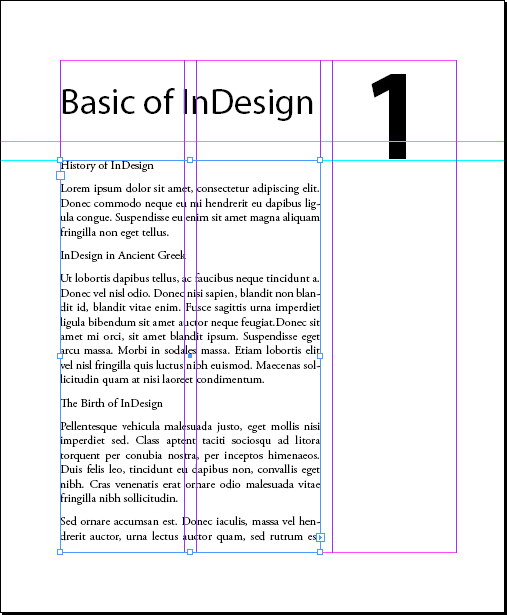
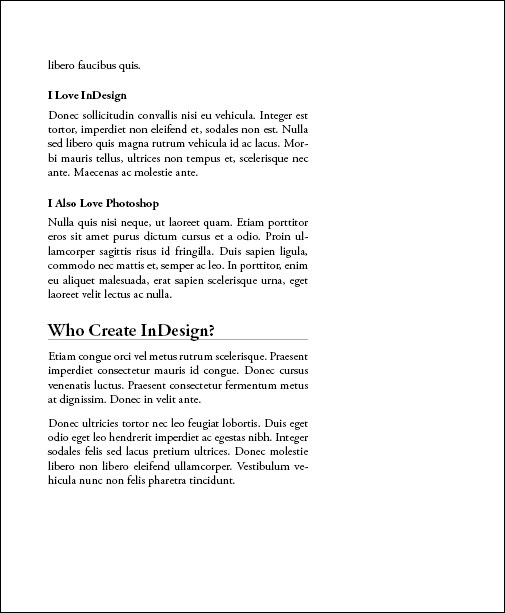
Add a heading and sub heading to the dummy text.Step 20
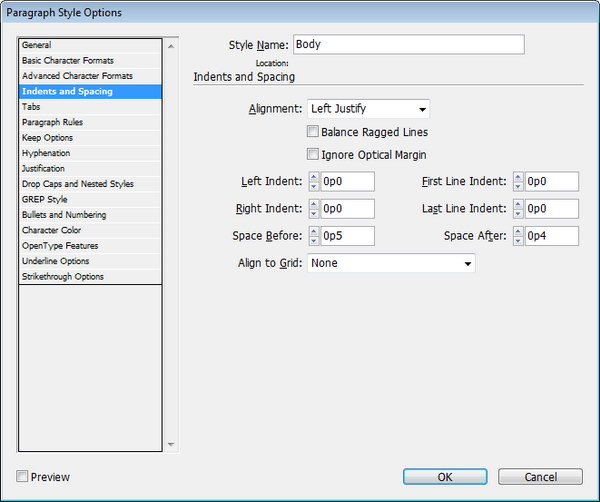
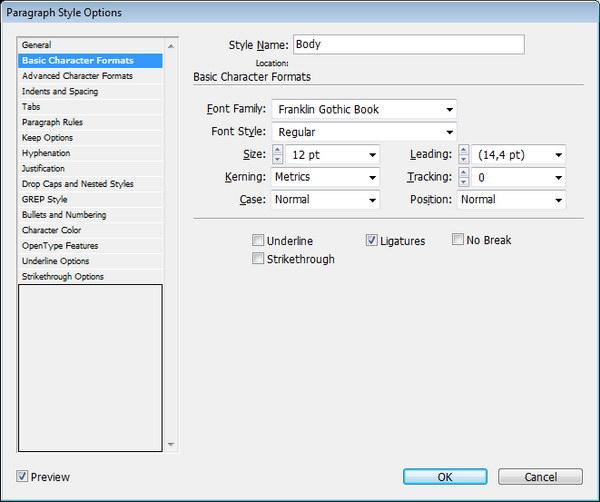
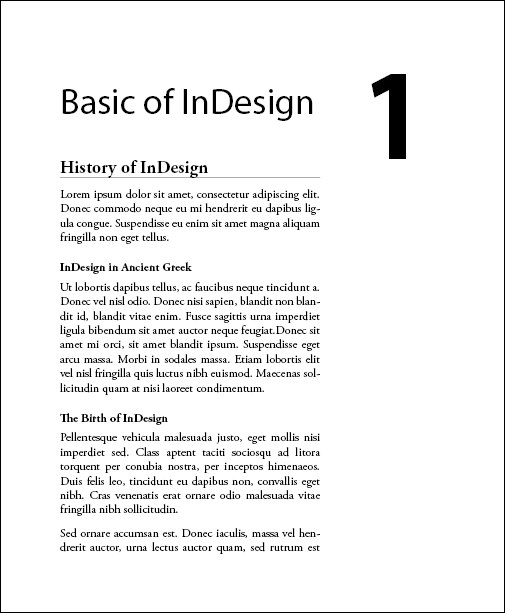
Create new Paragraph Style named "Body". Use the following settings.Step 21
Apply the new paragraph to the dummy text to see its result.Step 22
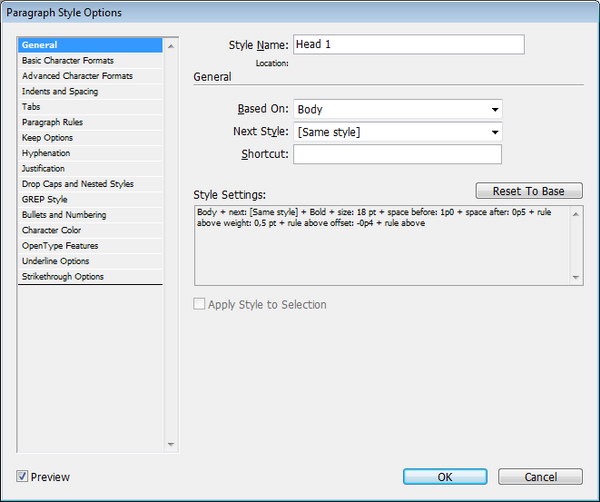
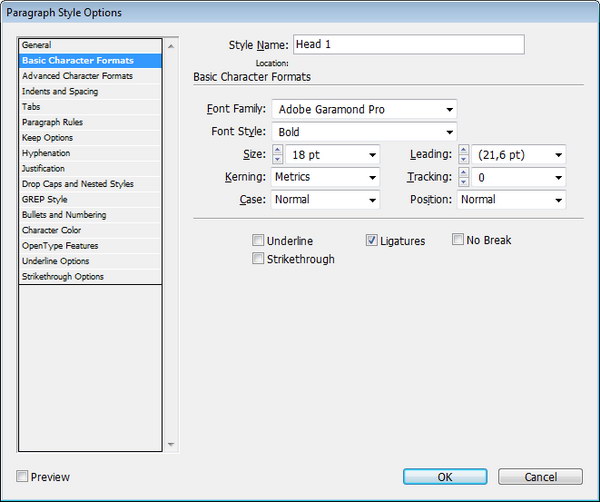
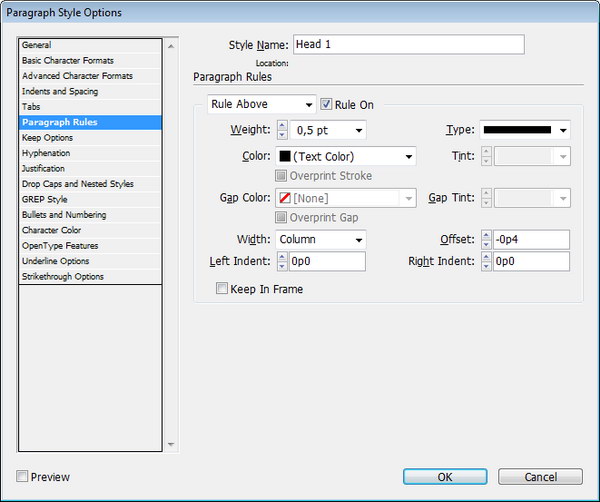
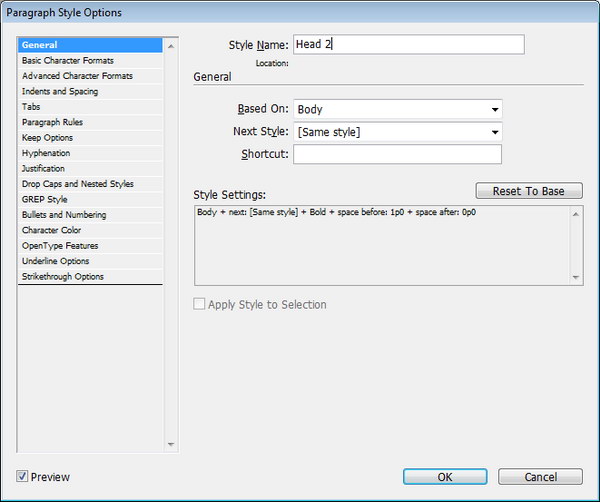
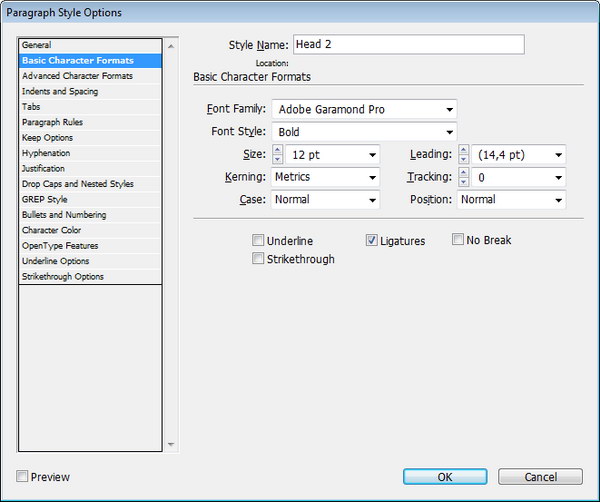
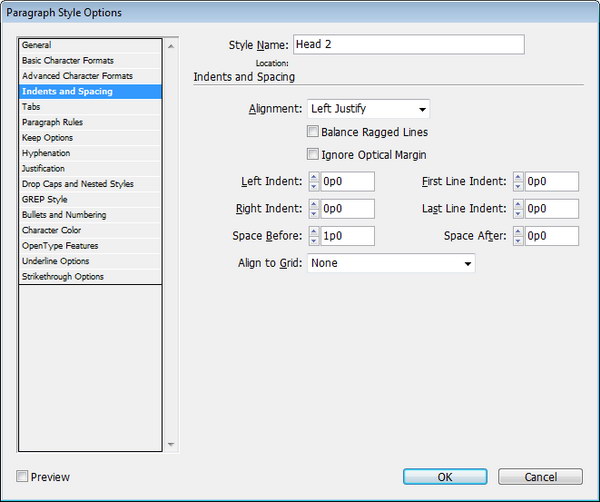
Let’s create two new paragraph styles for the heading and sub heading. "Head 1" for the heading and "Head 2" for the sub-heading. In General, make sure you set "Based On: Body" for both styles.Step 23
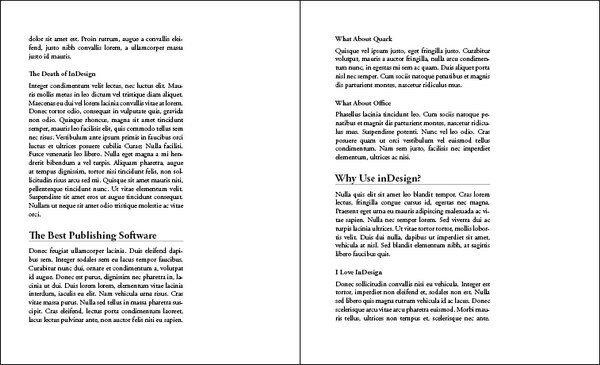
Apply the new paragraph styles, here’s my result.Step 24: Understanding Based On Paragraph Styles
In the previous step, we set "Head 1" and "Head 2" to "Based On: Body". What was that for? Let’s try an experiment. Double click on the Body Paragraph style to edit it. Change the Font Family to something different. Make sure you select the Preview check box to see the result in real time.Step 25
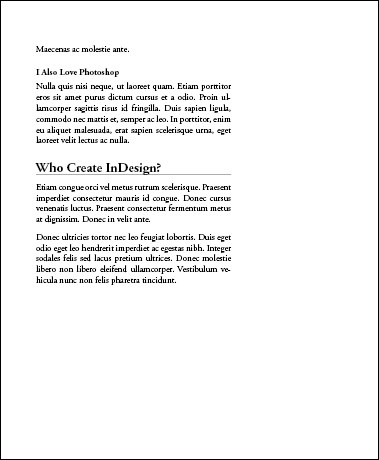
We can see that the font family in the heading and sub-heading have changed with the changes in Body Paragraph style.Step 26: Wrapping Text
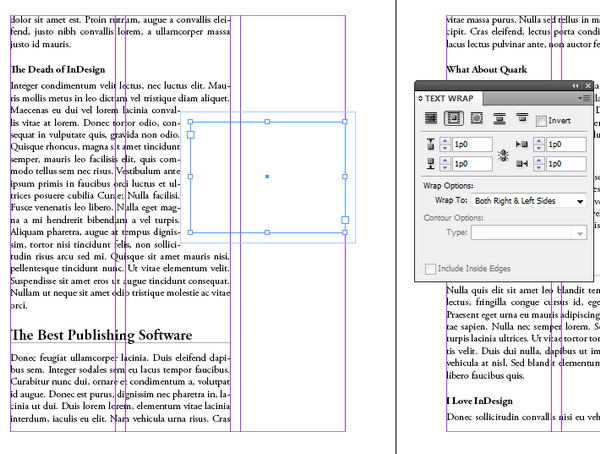
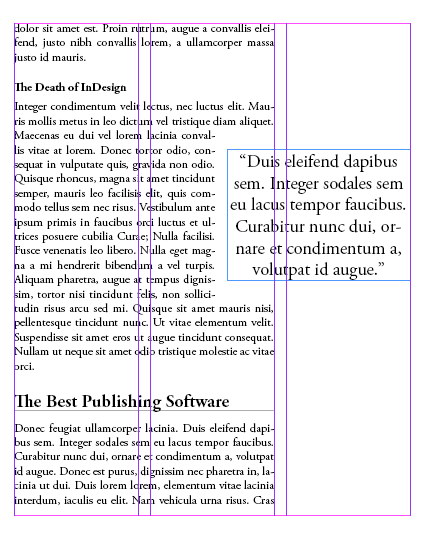
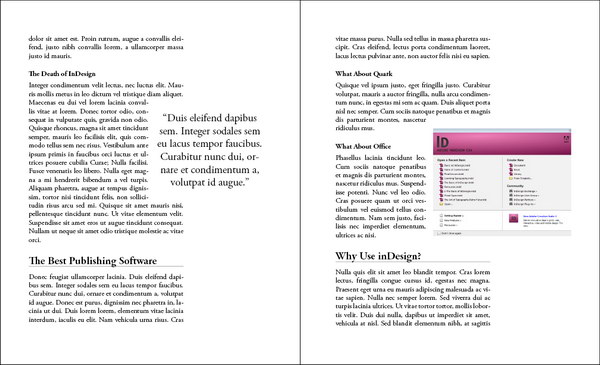
Let’s learn how to wrap text. Create a text frame in the third column. Open Text Wrap and select the second icon to warp text around the box.Step 27
Drag a picture onto your document. Add Wrapping from the Text Wrap panel.Step 28
This is now in our first chapter.Step 29: Create Dynamic Footer Using Text Variables
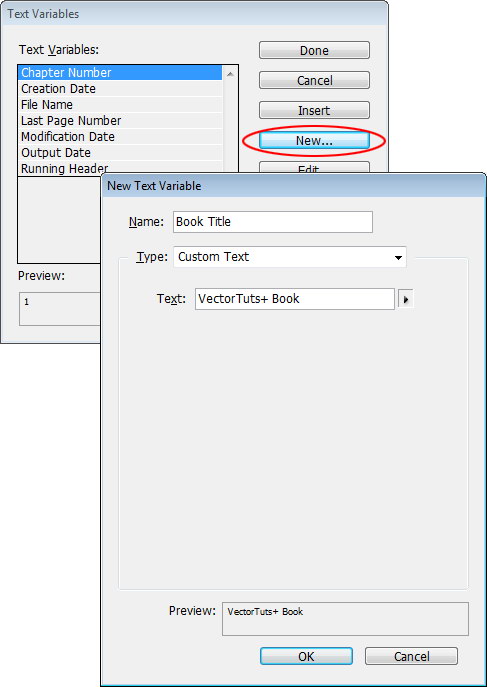
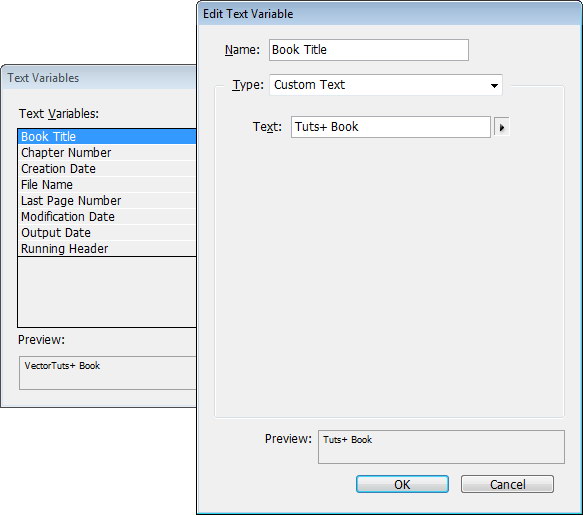
The one thing we’re missing is the footer. We want the footer to appear in every page that uses "A Master Page". Double click the "Master Page A" in the Pages panel to edit it. We will create a footer with dynamic content using variables. Click Type > Text Variables > Define. Click New, use the Name: Book Title, Type: Custom Text. Insert "VectorTuts+ Book" for the value.Step 30
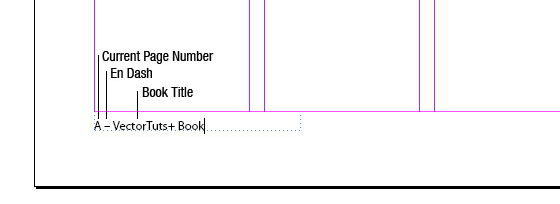
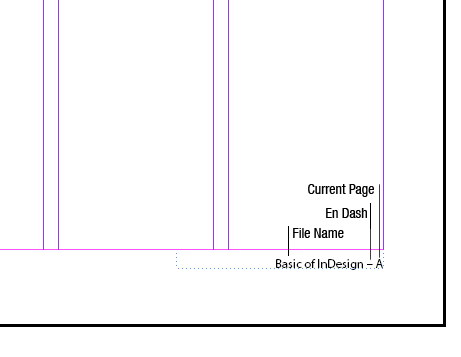
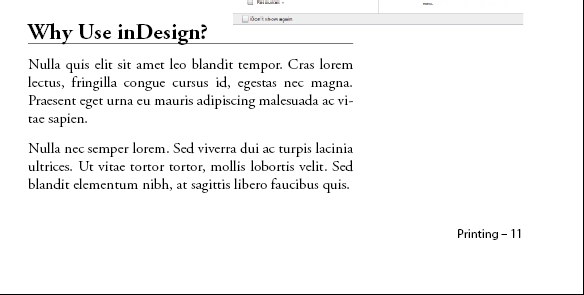
Create a text box on left page corner and select Left Align. For the content, click Type > Insert Special Character > Markers > Current Page Number, add space, click Type > Insert Special Character > Hyphens and Dashes > En Dash, add space, click Type > Insert Variables > Book Title.Step 31
Create another text frame in the right corner and select Right Align. For the content click Type > Insert Variables > File Name, add space, click Type > Insert Special Character > Hyphens and Dashes > En Dash, click Type > Markers > Current Page Number.Step 32
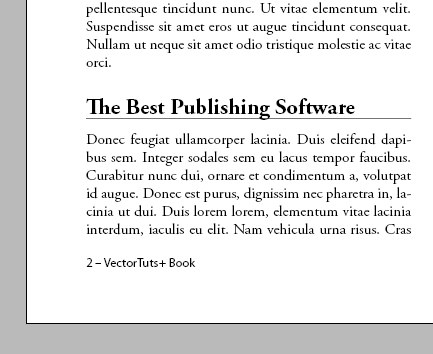
In the Master Page the page number is represented by the letter A. If you return to the normal page you’ll see that the page number has changed to the actual page number.Step 33
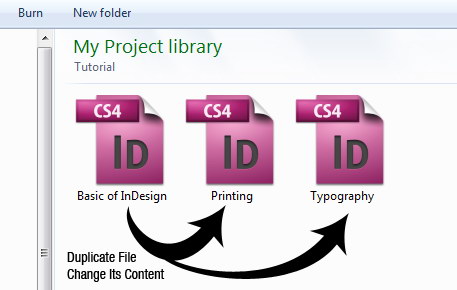
To create another chapter, we can just duplicate the previous one, then change the title and content. For this tutorial, let’s create three chapters.Step 34: Start Creating Book
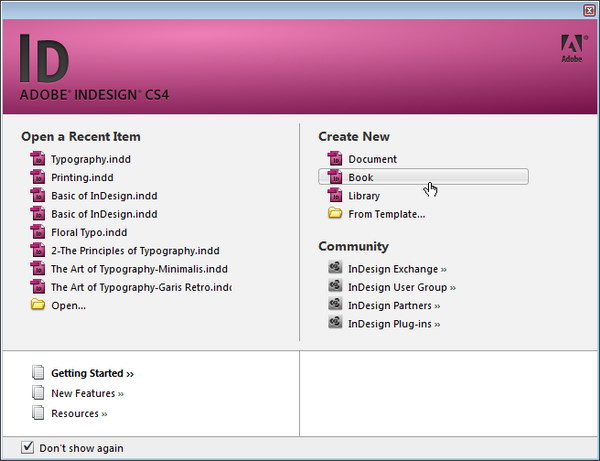
Let’s start collating the chapters into a book. Create a new book from the menu File > New > Book or click Book in the Welcome Box (shown below). Name the book "Vectortuts Book". At first you may be confused, book is not a normal InDesign file. Book is not a document where you can add text or a page, book is a collection of documents that can share styles, swatches, master pages, and other items.Step 35: Organizing Documents
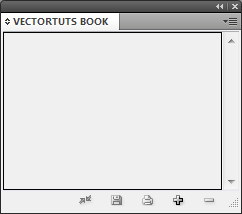
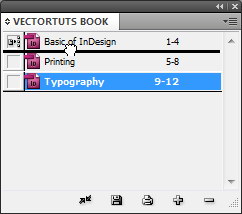
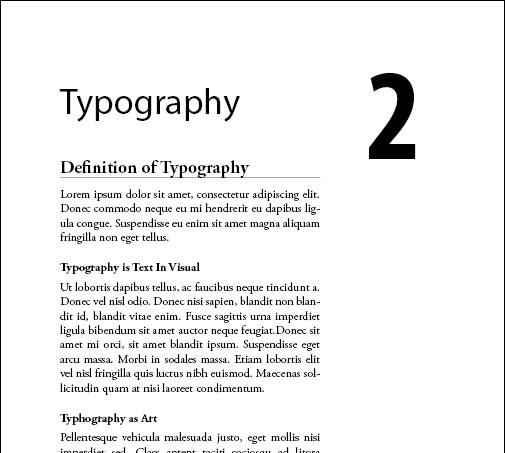
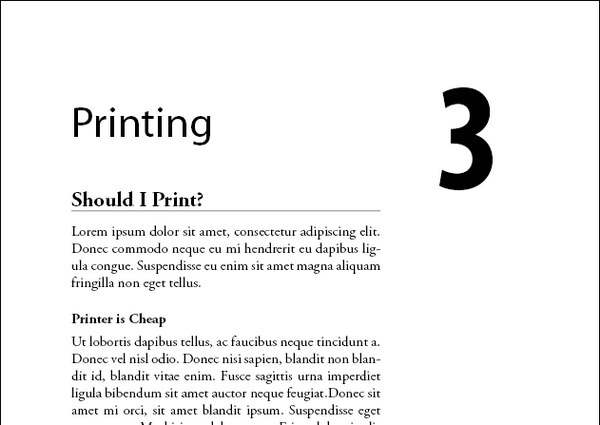
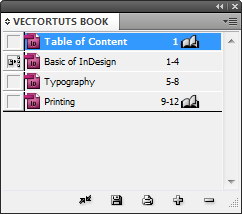
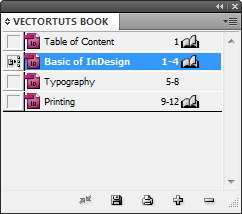
Currently, the book is still empty. To add a document click the add icon, select the three chapters you created. You can rearrange the order of the document by dragging it. In this case, I want "Typography" in Chapter 2. So, I drag "Typography" and put it between "Basic of InDesign" and "Printing". After you rearrange the documents, by default InDesign will automatically refresh the book’s page numbers.Step 36
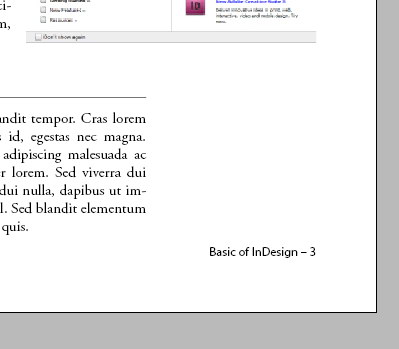
Let’s see what has happened to our document. Open the chapter "Typography" by double clicking on it in the book panel. You’ll find that its chapter number has automatically changed to 2. Chapter number in "Printing" has changed to 3. Also see the page number in the footer, they have changed too.Step 37: Manually Update Page
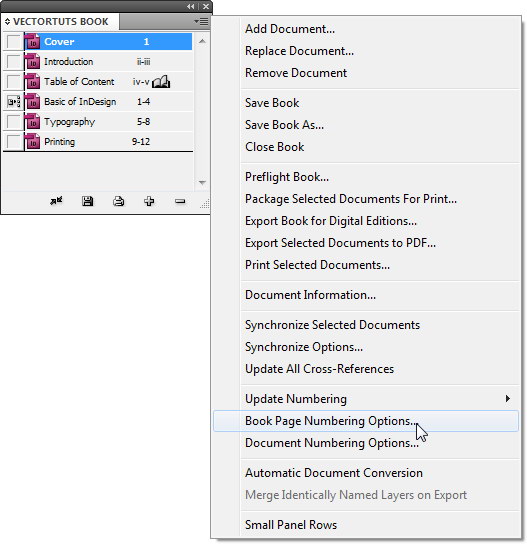
If you’re working with a large number of chapters, Automated Page Number updating will waste your time. To turn it off, open the book panel menu and choose Book Page Numbering Options. De-select Automatically Update Page then click OK.Step 38
Create new document and name it "Table of Content". Add it to the current book.Step 39
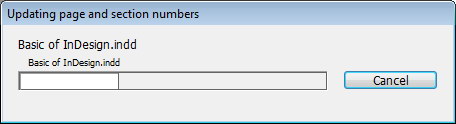
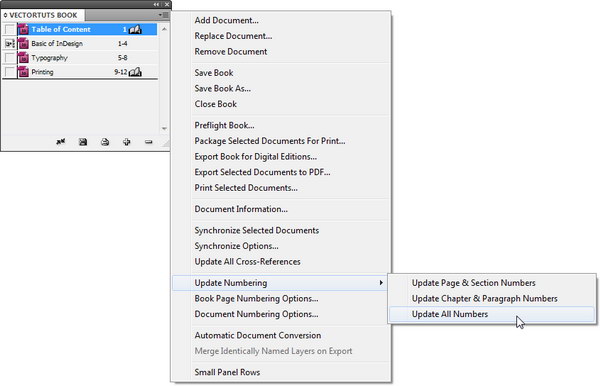
Because Auto Update Page is turned off, we need to manually update the document. Open the book panel menu and choose Update Numbering > Update All Numbers.Step 40
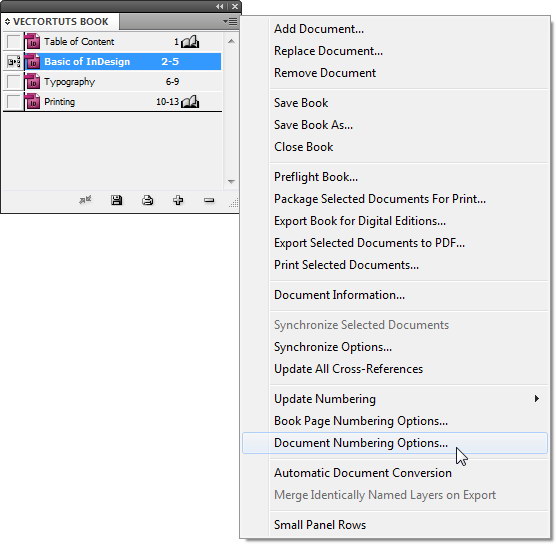
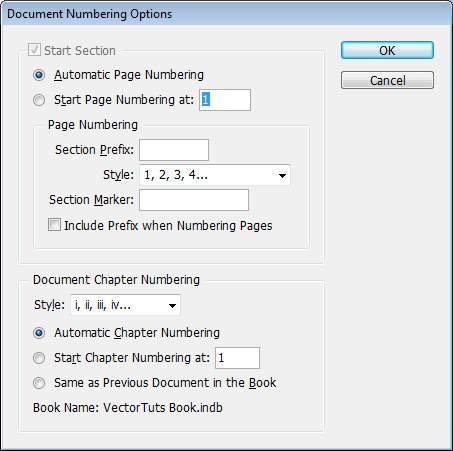
We have a problem now, "Basic of InDesign" is considered as Chapter 2 because its position is second. We also want numbering for Chapter 1 to start from 1. To fix this, in the book panel choose "Basic of InDesign" document and choose Document Numbering Options.Step 41
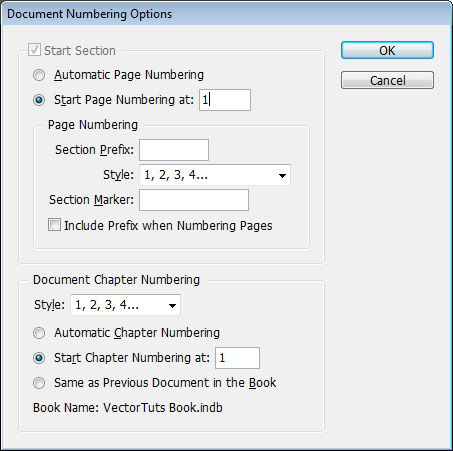
Set Start Page Numbering to 1 and Start Chapter Numbering to 1. Click OK..Step 42
Update the numbering by opening the book panel menu and choosing, Update numbering > Update All Numbers.Step 43: Generating Table of Contents
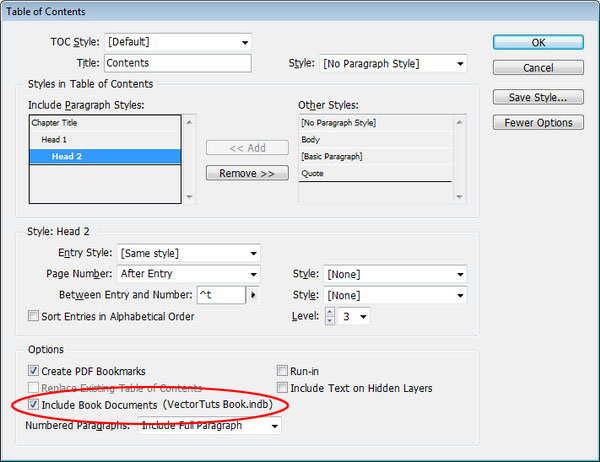
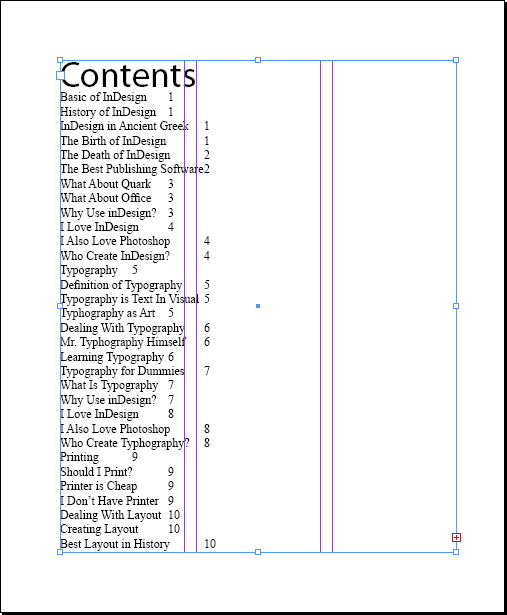
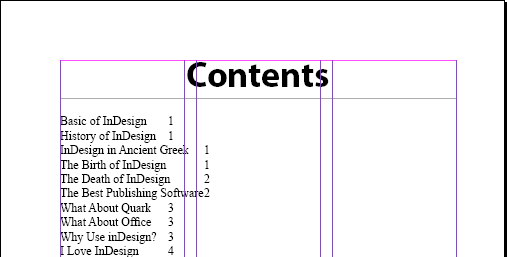
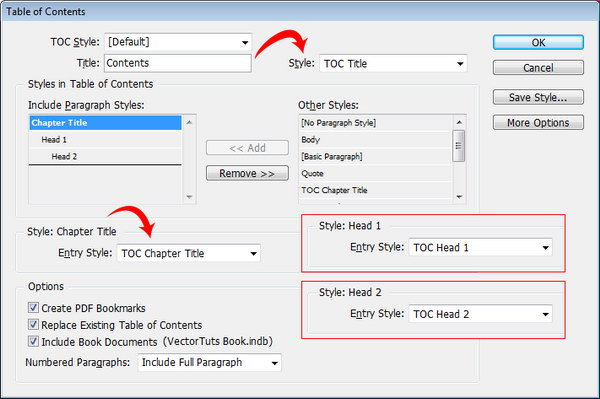
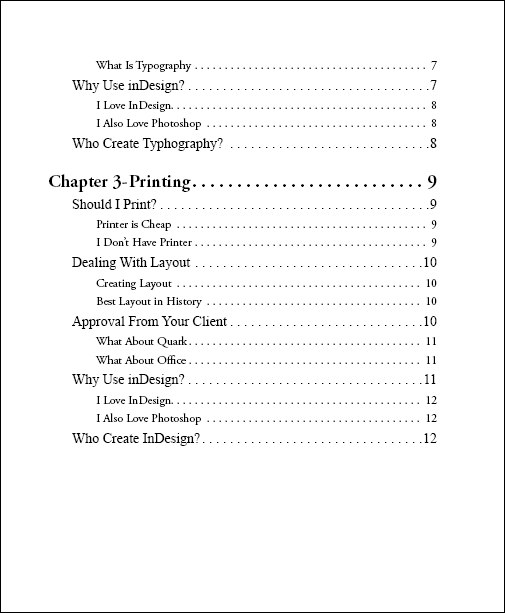
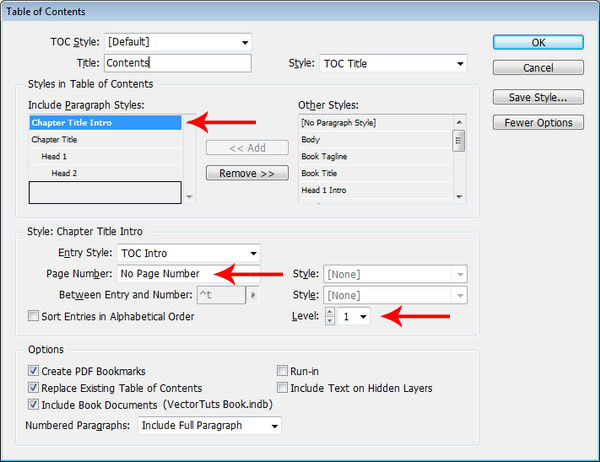
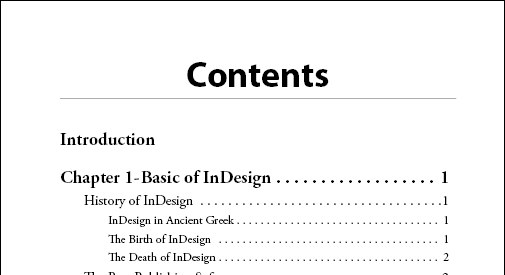
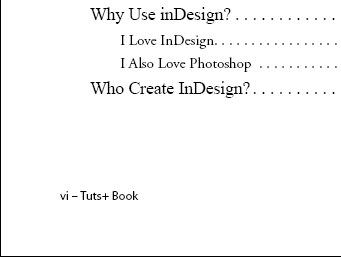
Open the "Table of Content" document. Let’s generate a table of Contents for the book. Click Layout > Table of Content. First, make sure you select Include Book Documents. For the Title type "Contents". Double click Style Chapter Title, "Head 1", and "Head 2" to include them in the Table of Contents. Click OK. Click and drag on the document to create a text frame filled with a very basic Table of Contents.Step 44
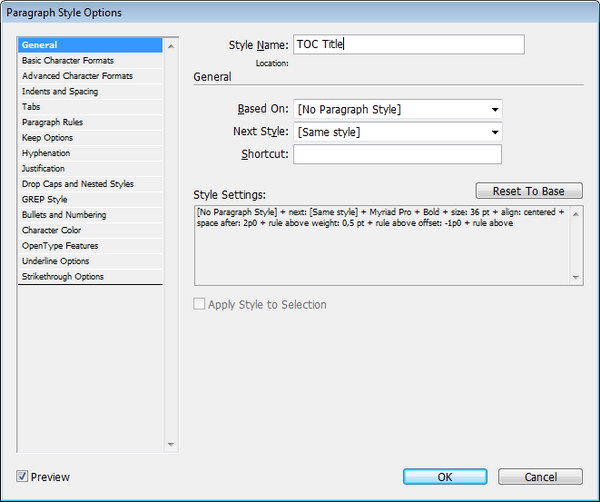
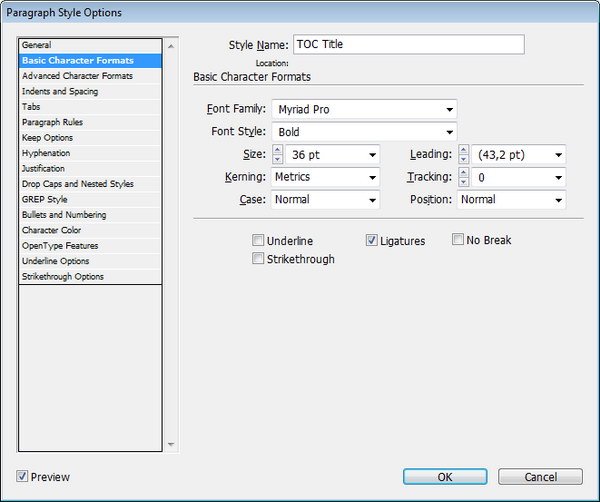
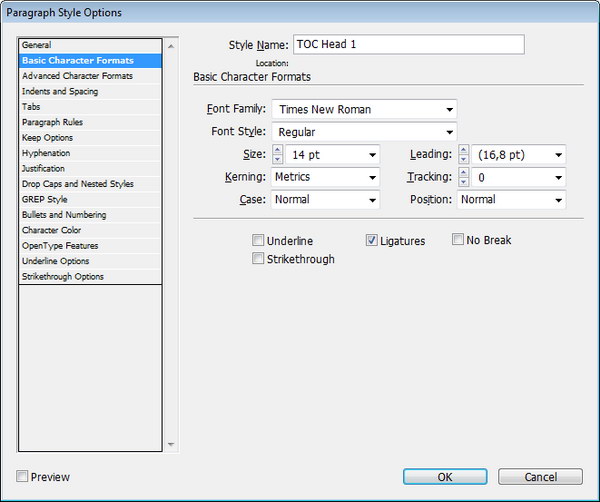
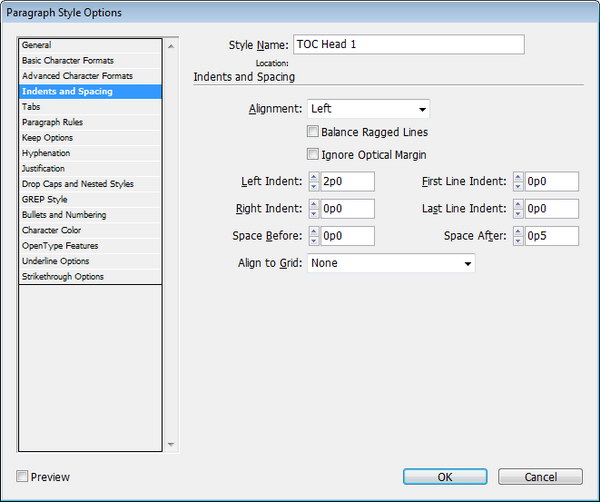
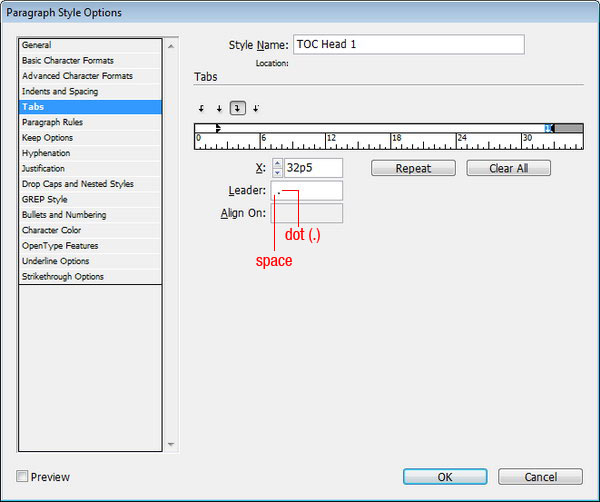
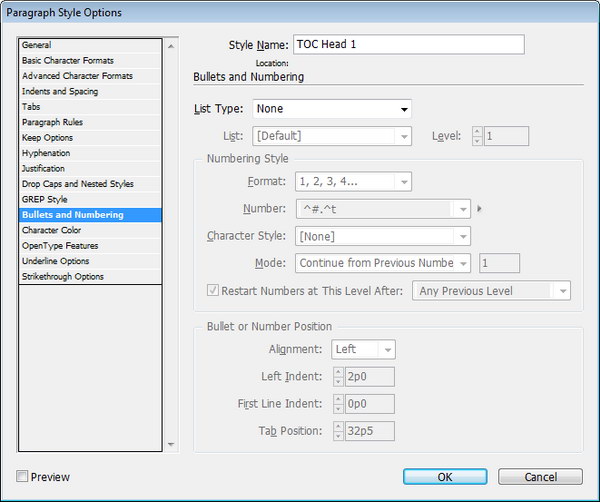
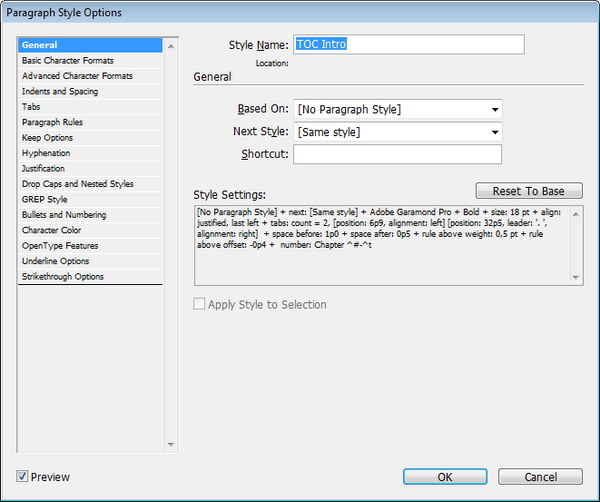
We’ll modify the Table of Contents by adding some paragraph styles. Open the Paragraph Styles panel and create a new paragraph style. Edit the new paragraph style and name it "TOC Title" and use the following settings.Step 45
Apply this style to the Table of Contents title.Step 46
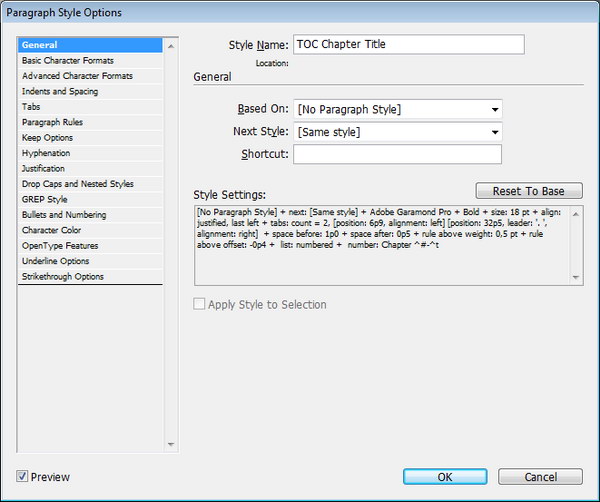
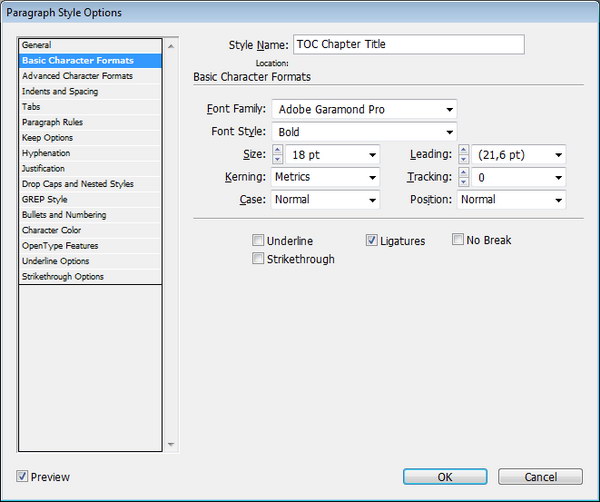
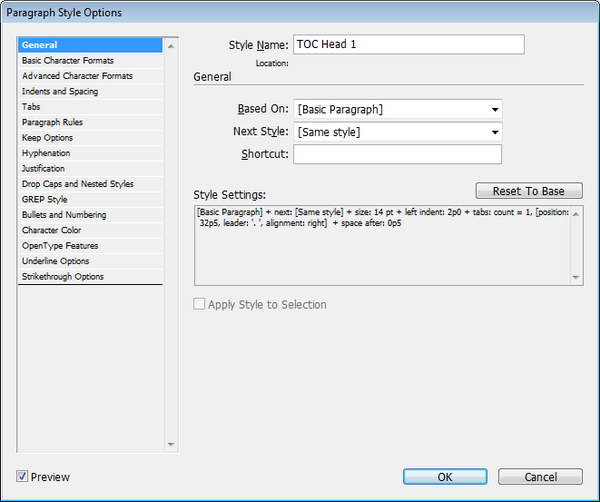
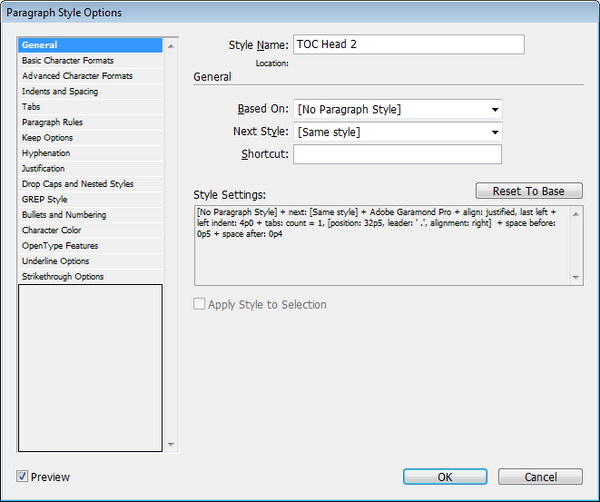
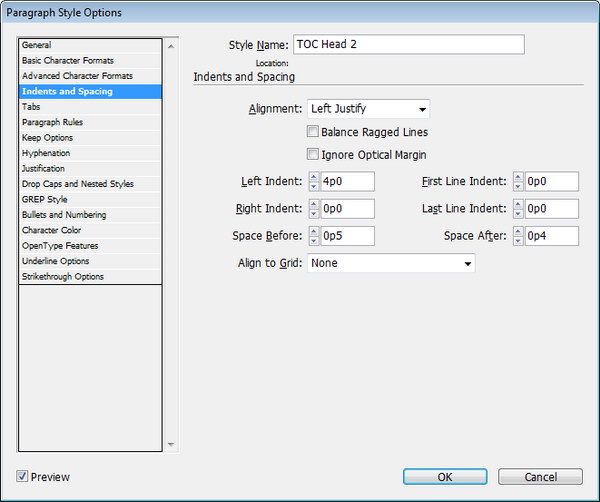
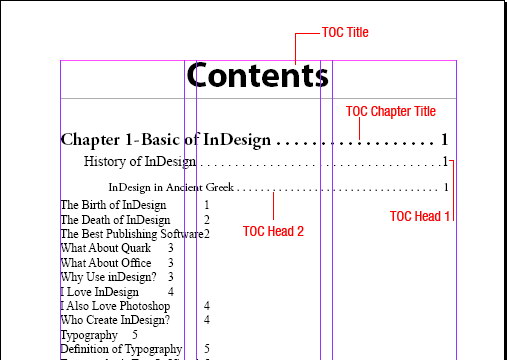
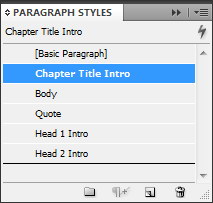
Create a new paragraph style for Chapter Title, Heading 1, and Heading 2.Step 47
Apply paragraph styles to the indicated content.Step 48
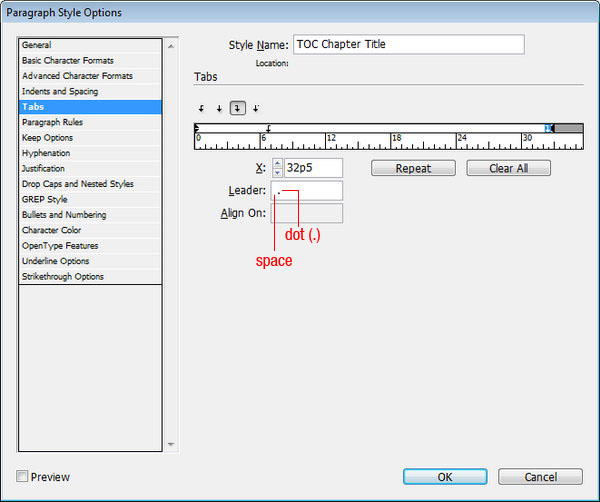
Once you’ve found the perfect style setting, edit the Table of Contents. Click Layout > Table of Content. For the Title use Style: "TOC Title", for the Chapter Title use Entry Style: "TOC Chapter Title", Head 1 use Entry Style: TOC Head 1, and Head 2 use Entry Style: TOC Head 2. Make sure you select Replace Existing Table of Contents then click OK.Step 49
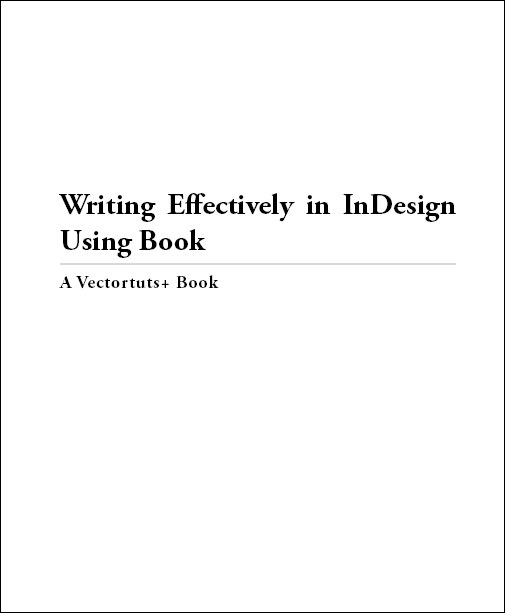
Create a new file named "Cover" and add it to the Book. Place this document first in the order. Create a text frame and write the book title and author. Right click the text frame and set Align: Center and add 11p0 to the bottom to move the text up.Step 50: Overriding Master Page Object
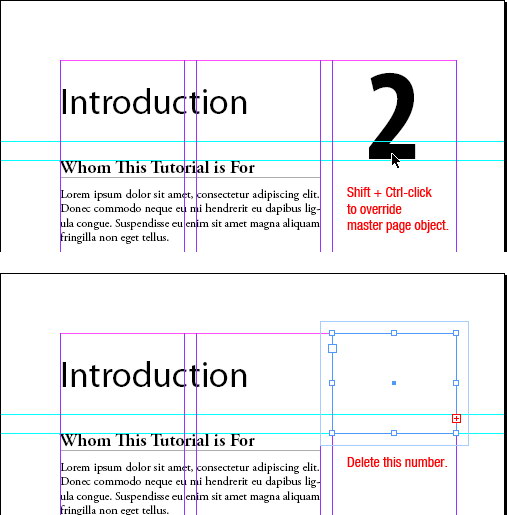
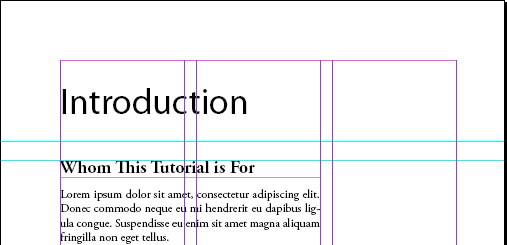
Copy one of the book chapters and change its file name to Introduction. Add the file to Book, place it second after "Cover" then open it. This document is created as an introduction to the book and is not part of the content. Therefore, we don’t need a page number in its first page. To fix this, we’ll override the master page object. Hold Shift + Control then click the chapter number to select it. Press Delete to delete it.Step 51
Let’s change the numbering in the Introduction and Table of Content to a Roman style. In the book panel select both documents, open the panel menu and select Document Numbering Options. Select Style: i, ii, iii, iv… to use the Roman style. Update page numbering by opening the panel menu and select Update Numbering > Update All Numbers.Step 52
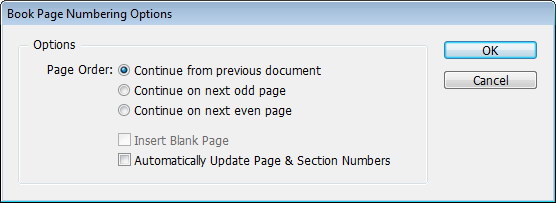
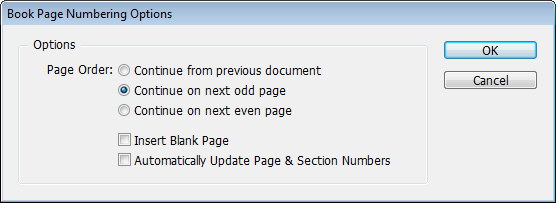
We have another problem here. The cover has only one page and this is causing the next document to start in even pages and it doesn’t match the book layout. Open book panel menu and select Book Page Numbering Options. Set Page Order: Continue on Next Odd Page. Using this setting, every document in this Book will always start at an odd page.Step 53
Open the book panel menu and click Update Numbering > Update All Numbers.Step 54
In the "Introduction" document. We don’t want heading and subheading from this chapter showing up in the Table of Contents. Let’s change the paragraph style name.Step 55
Return to the "Table of Contents" document. Let’s create a paragraph style for the new entry from "Introduction".Step 56: Modifying Table of Contents
Click Layout > Table of Contents. Add "Chapter Title Intro" in the include Paragraph Styles list. Position it on top in level 1. Use Entry Style "TOC Intro". Select Page Number: "No Page Number", we don’t need page numbers for this setting.Step 57
Click OK and you’ll see that we just added "Introduction" to the beginning of the Table of Contents.Step 58: Synchronizing Styles
Book helps us maintain a consistent layout throughout our project. What happens if I decide to change the font inside the book? Open "Basic of InDesign". Open paragraph style Body and change the font family to Calibri.Step 59
Click OK and you’ll see that all text is now in Calibri.Step 60
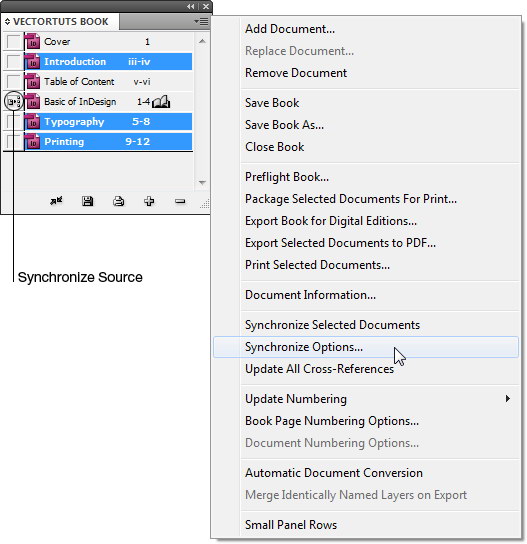
To apply changes to the entire document we need to Synchronize Documents. First, set the source file that will be used, in our case "Basic of InDesign", by clicking the icon box in front of it. Open the book panel menu and choose Synchronize Options.Step 61
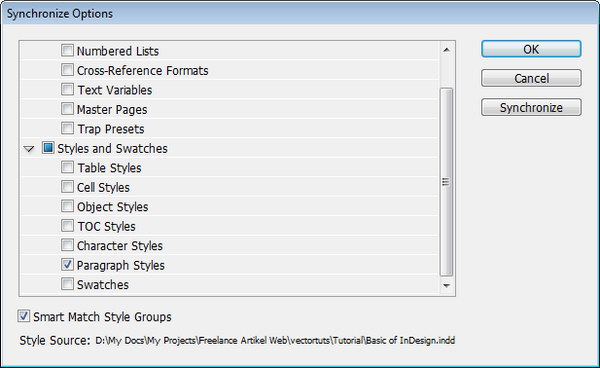
In the dialog box, select the object that we will synchronize, in this case the Paragraph Styles. Click OK.Step 62
Open the other chapter and see what happens. All the body text is now in Calibri.Step 63: Synchronize Variables
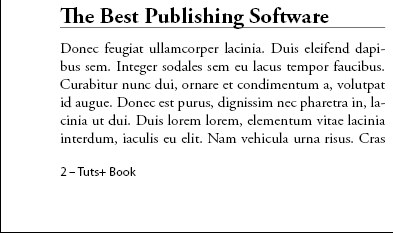
What if we want to change the footer text from "Vectortuts+ Book" to "Tuts+ Book"? Because the text is taken from the Variable" Book Title" we can just change the value and synchronize it with other documents. Click Type > Type Variables > Define. Select "Book Title" and click the Edit button. In the next dialog change the Text to Tuts+ Book.Step 64
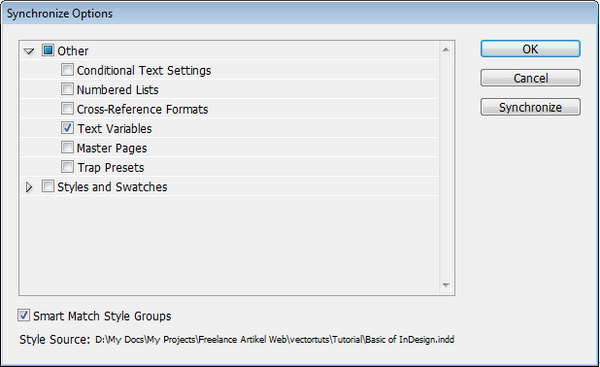
Open the panel book menu and choose Synchronize Options. Select Text Variables then click OK.Step 65
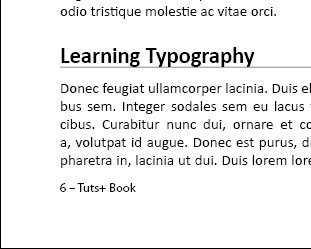
Here’s what we have in the footer of the document.Step 66: Package Book For Print
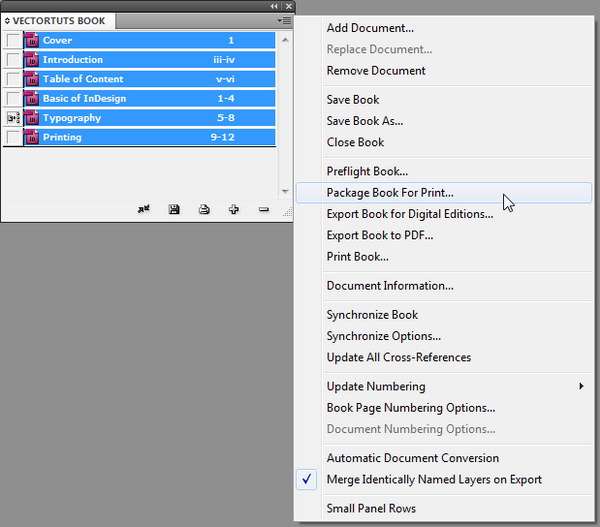
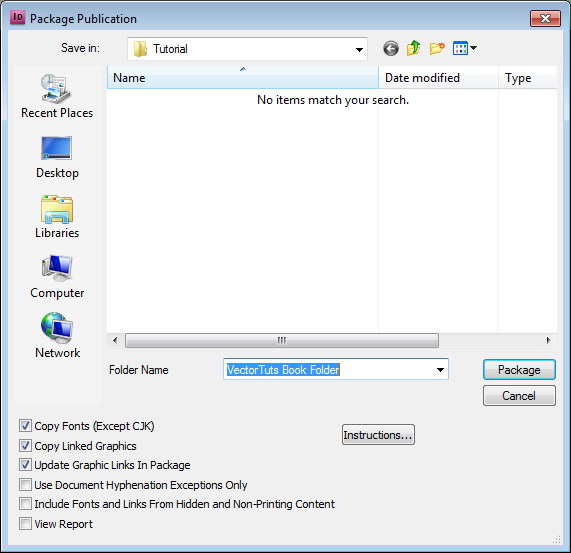
Once you’re done with the book you need to send the final result to the publisher. Problems may happen if you copy and paste the INDD file. Some files or fonts may be missing. To ensure you include everything that’s needed by the printer, you need to package your book. In the Book Panel select all documents and select Package Book For Print.Step 67
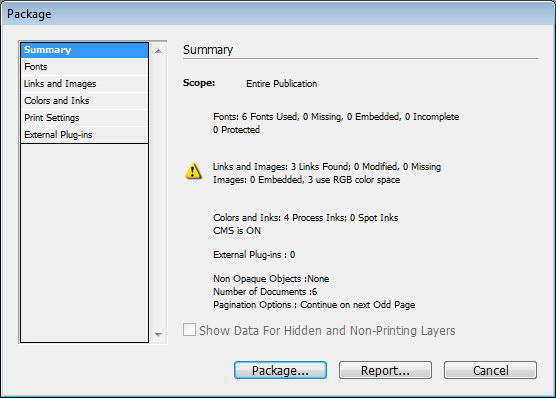
InDesign will give you a summary about your document. Click Package to continue the packaging process.Step 68
Name your folder and press Package.Step 69
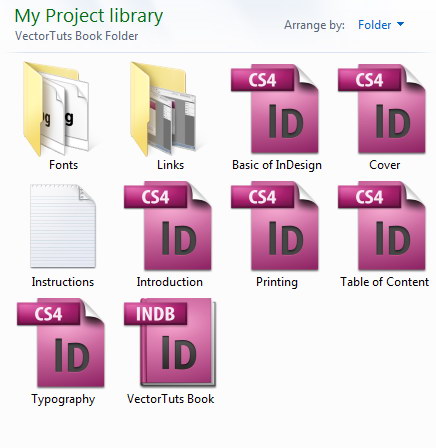
All your documents will be placed in one centralized folder. All links in the document have been fixed and fonts used in the document have been included. There will also be a text file named "Instructions" containing detailed information about your document. The next thing to do is zip the folder and send it to your publisher.Step 70: Print Book to PDF
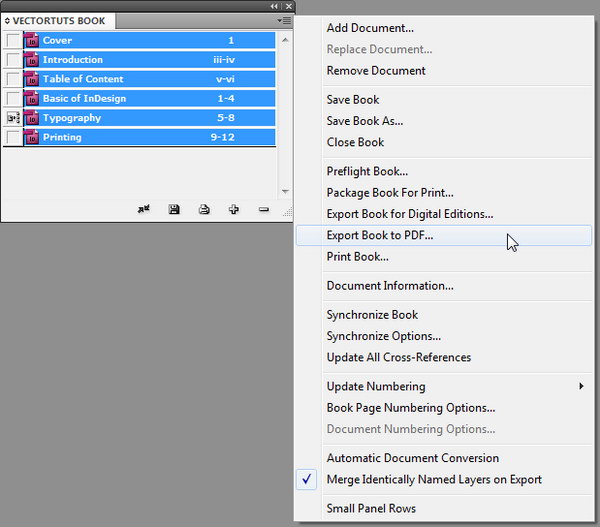
If for some reasons your publisher can’t use the InDesign file, you can send them the book in PDF. To create a PDF file from the book, select all documents, open the panel menu and choose Export Book to PDF.Step 71
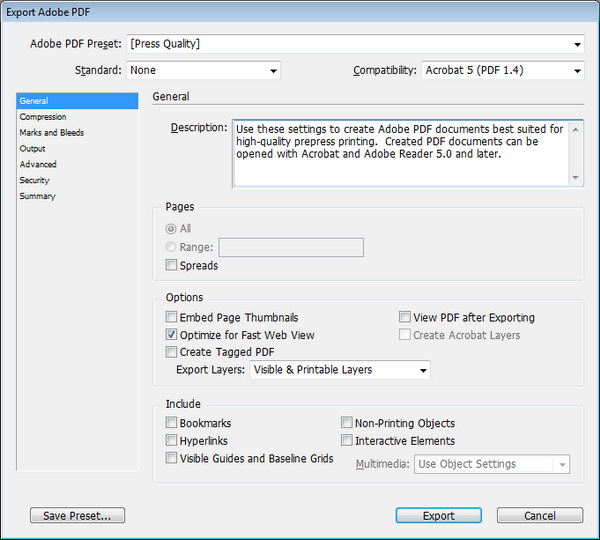
Make sure you ask which PDF setting you publisher requires. Each publisher may have different setting. In most cases, you can just use the Press Quality preset.Conclusion
We can see here that the Book feature is very effective in creating a book with many chapters. With Book you can easily maintain a consistent layout in every document. Finally, I hope you enjoyed this tutorial and learned something new.